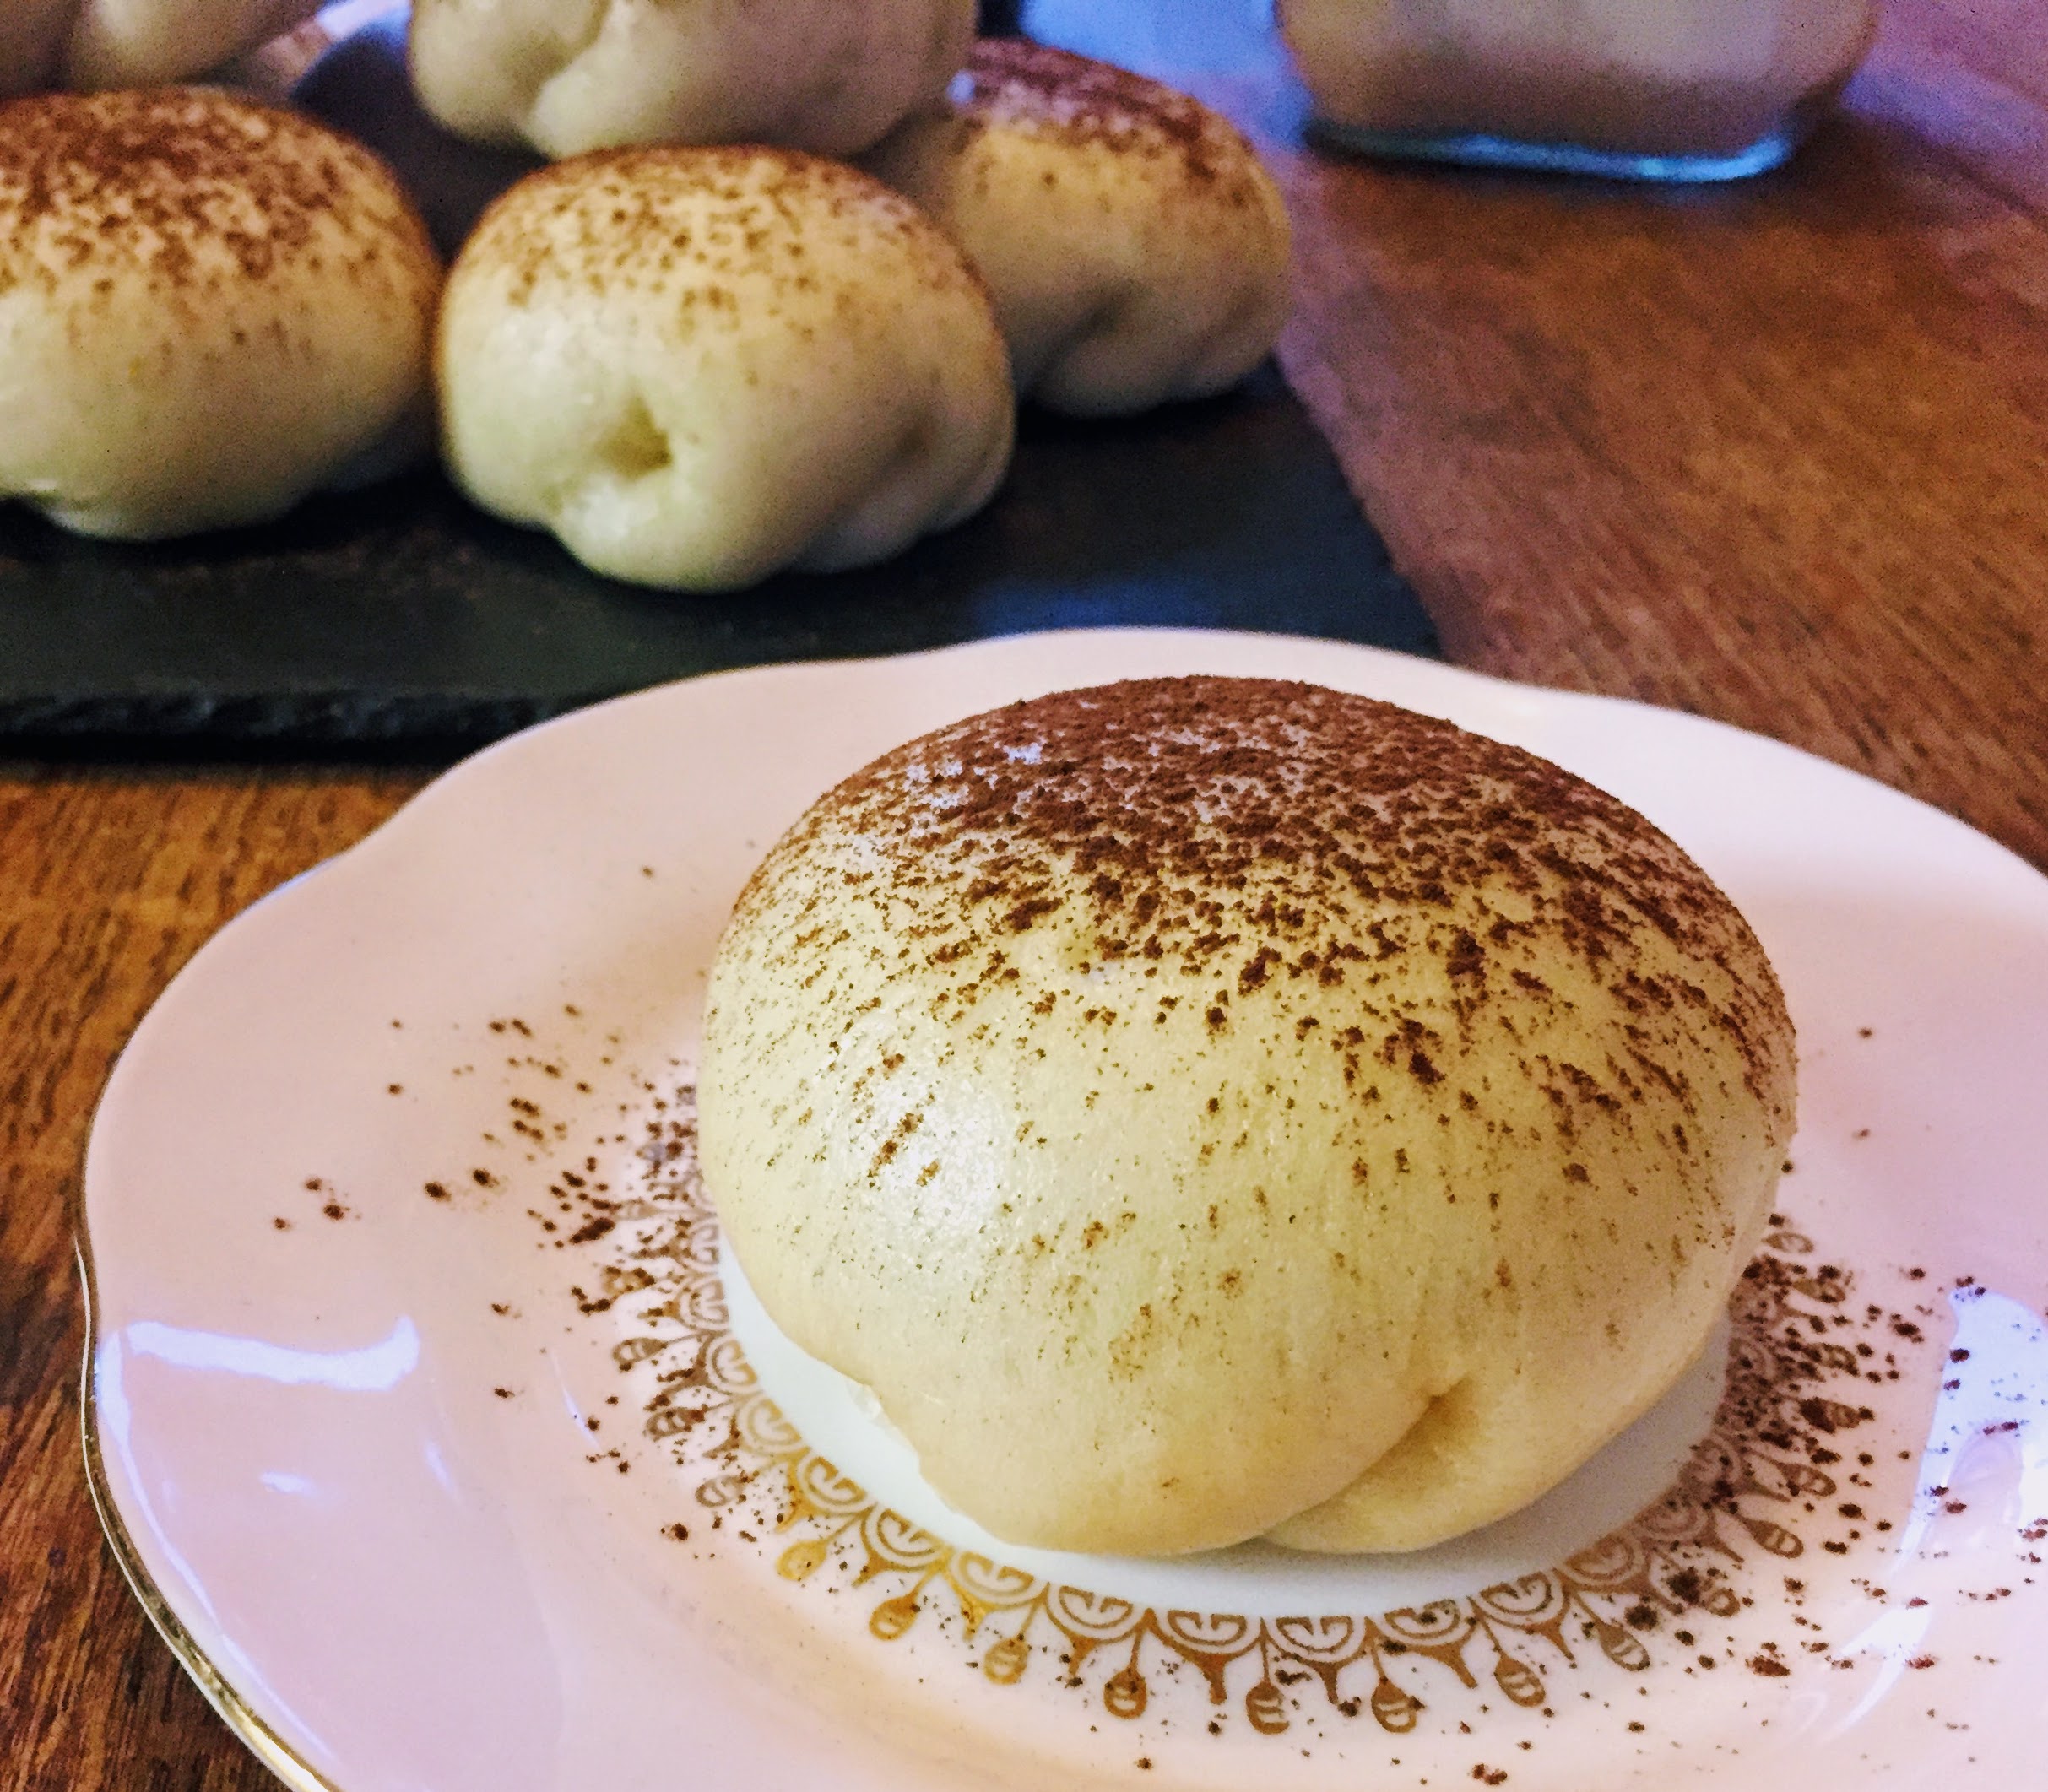
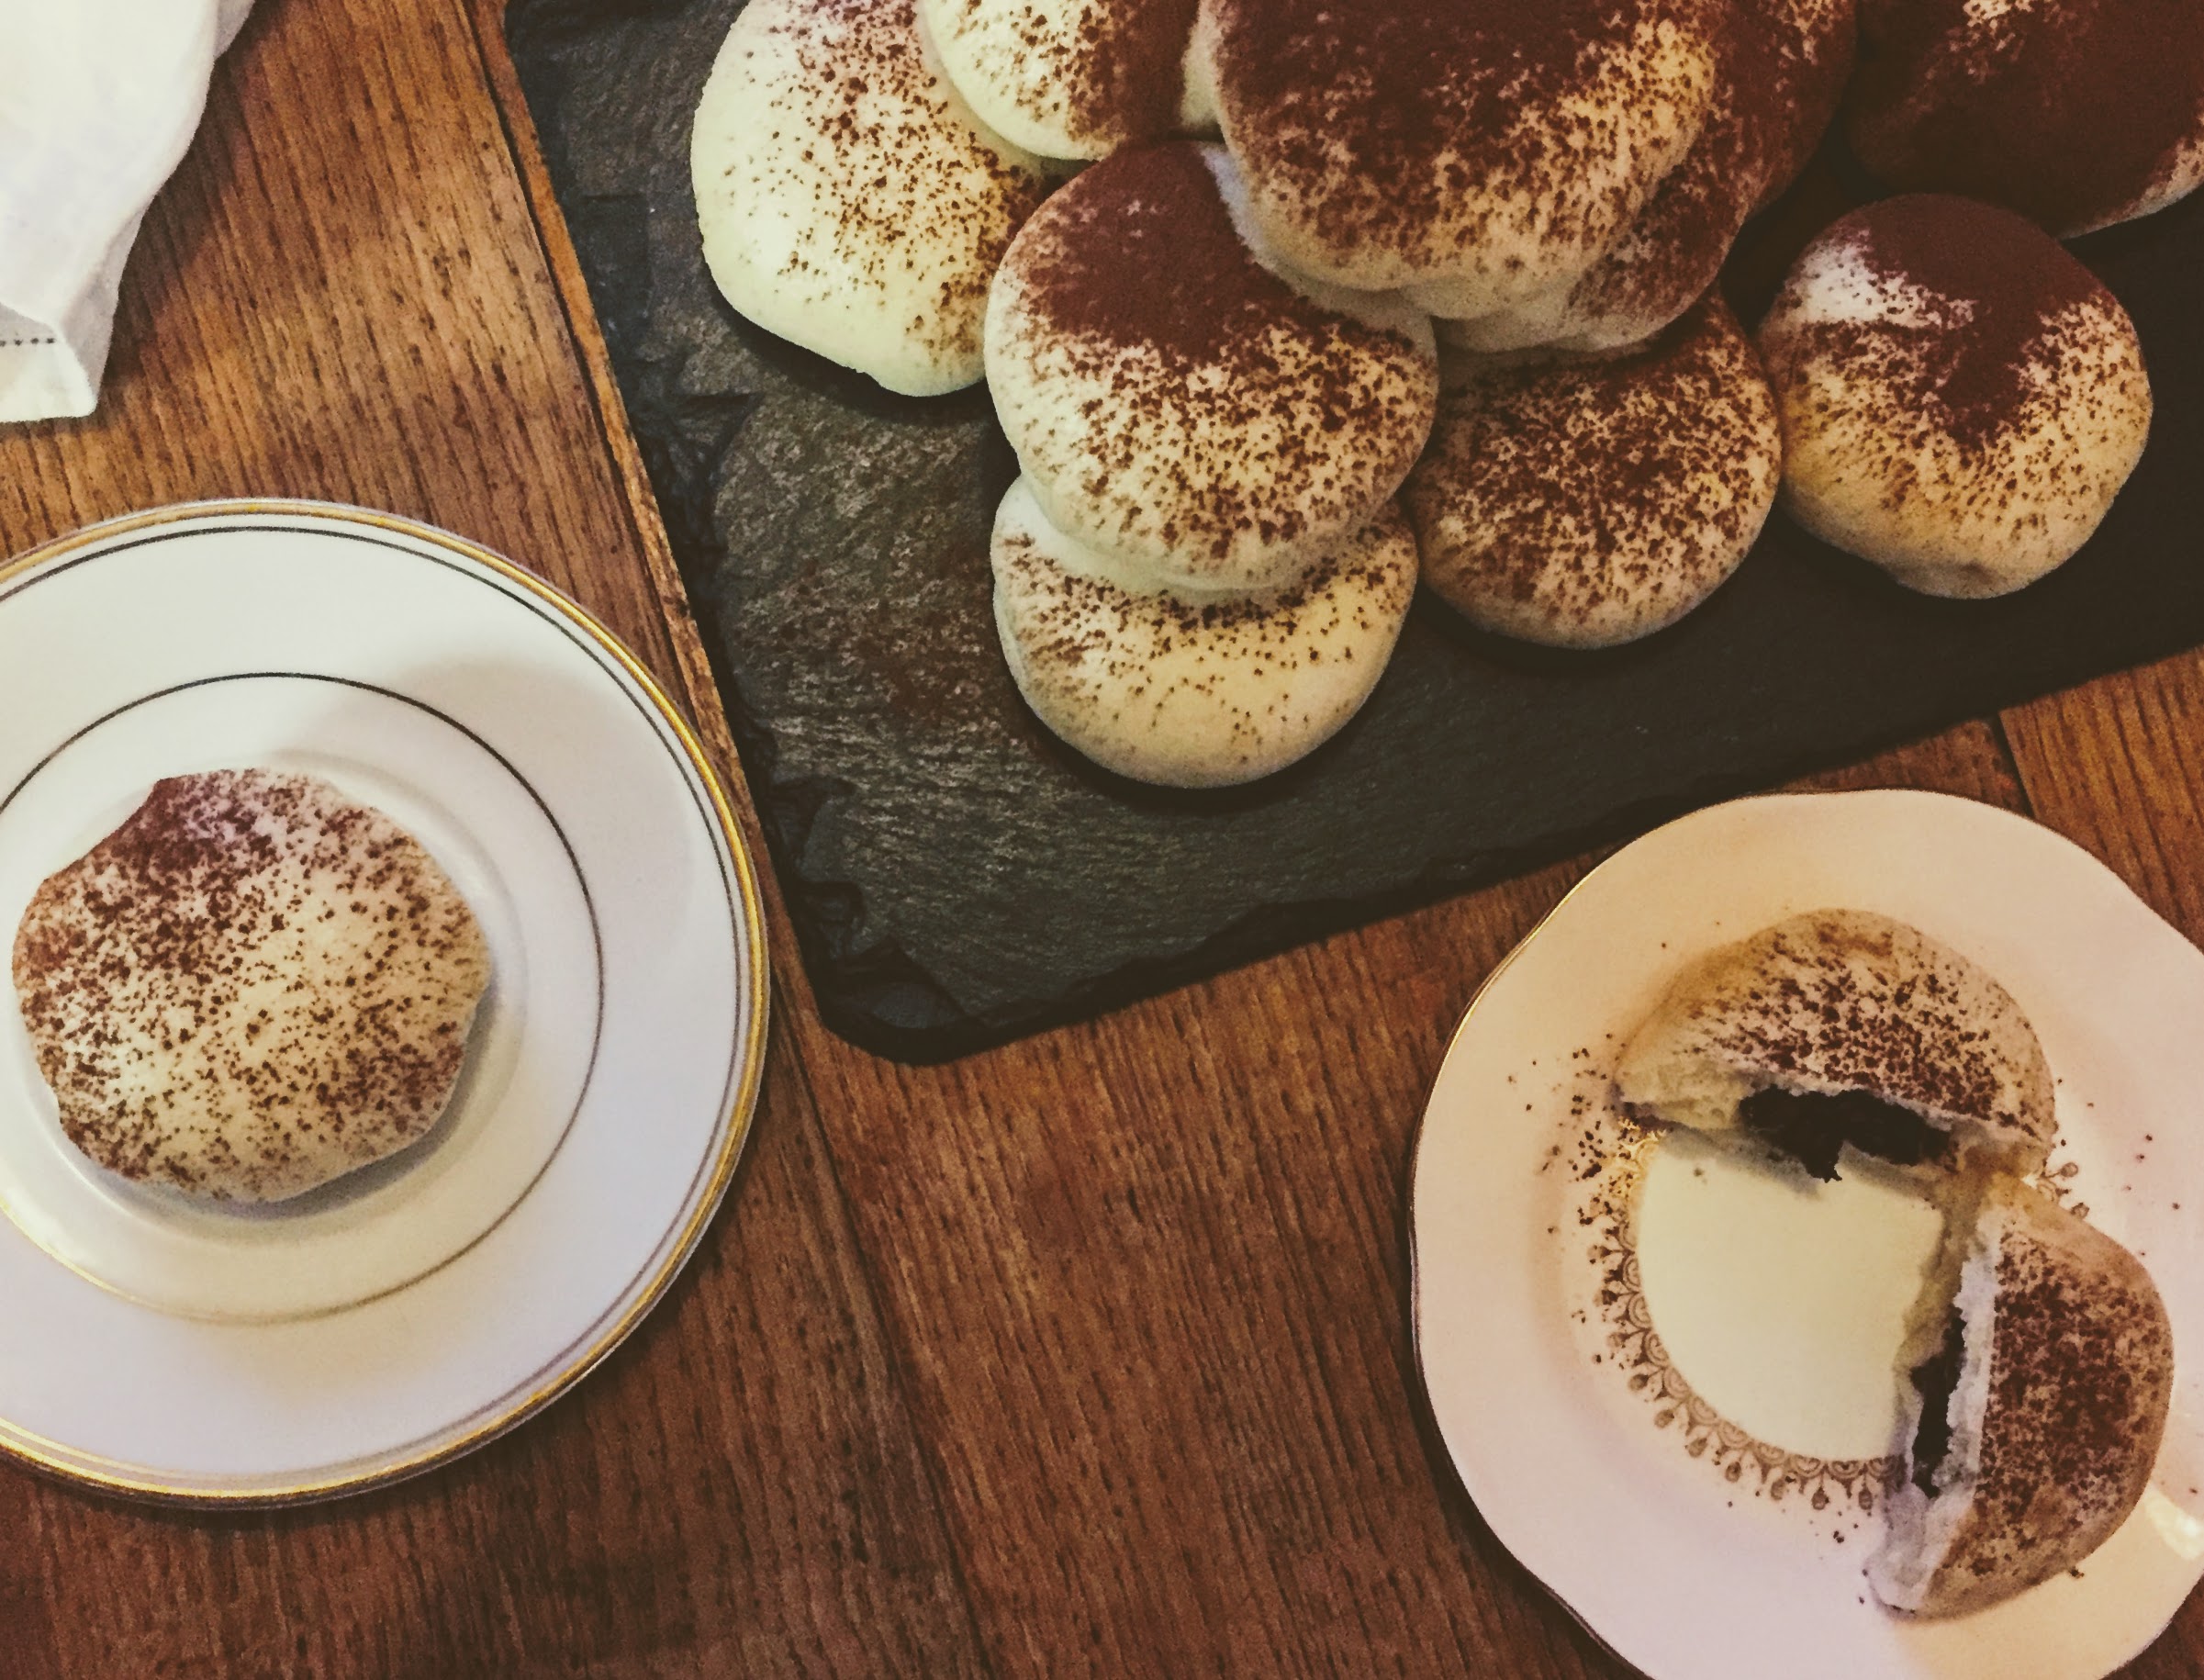
If you were to ask someone what they considered to be ‘appetizing’, I’m not sure that this smooth, plain, anaemic blob would be the first thing that came to mind. And yet for me, these buns are the height of temptation. I have never seen one of these and not wanted to immediately sink my teeth into it, and regardless of the filling, that initial soft and buoyant bite has never disappointed.
In the UK, when people think of bao, most would think of the folded variety stuffed with savoury delights. But these are only one of a whole variety of steamed treats that come under the bao umbrella. They originated in China but have been adopted by many other South East Asian countries. In Japanese cartoons, I would often see characters snacking on these round, filled versions, and I was fascinated by them before I knew what they were – somehow even the animated versions seemed deeply desirable.
Classic fillings for this variety of bao include minced pork, or egg custard, neither of which are very vegan. And then when I was thinking about how much I want to eat bao (which happens often) and then also thinking about how wonderful chocolate is (which also happens often), I dared to dream that it would be possible to combine the two. (SPOILER ALERT: it is possible and now it’s the only thing I want to eat).

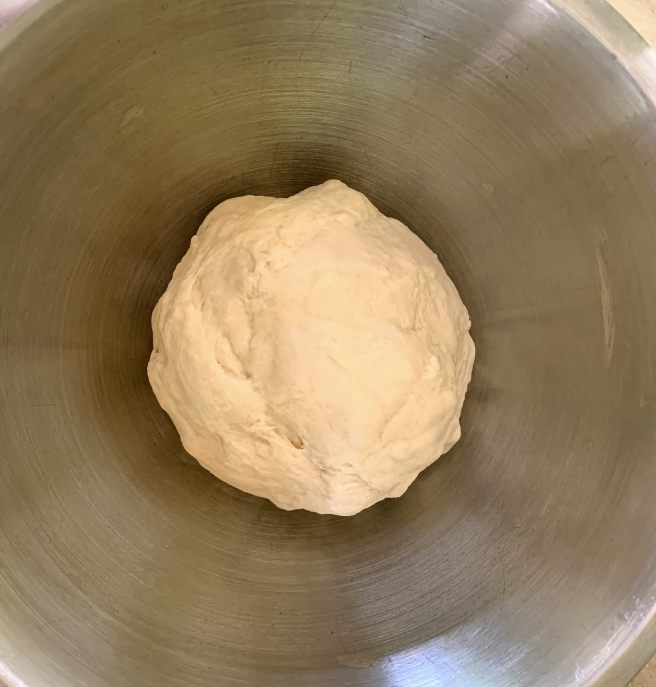
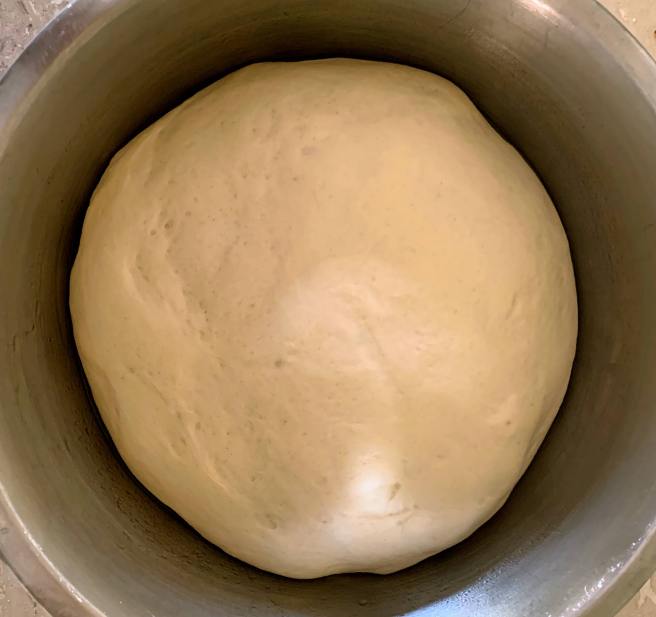
The dough is exactly the same as for savoury bao, except with a little more sugar. Simply add a pinch of the sugar and yeast to warmed water and non-dairy milk, and leave aside so the yeast can activate, while you measure out the dry ingredients; flour, salt and bicarbonate of soda. Everything then gets mixed together and kneaded for around 5 mins until you have a smooth and elastic dough. Cover with a damp cloth and leave to prove for 90 mins, or until doubled in size.
The chocolate filling is incredibly easy but requires a little fridge time to set. I make it as soon as the dough has started its first prove so it gets at least an hour in the fridge. You’re essentially making a vegan chocolate ganache which requires a grand total of three ingredients; dark chocolate, non-dairy milk and a pinch of salt. It’s up to you what sort of dark chocolate you use, however, given that the dough is reasonably savoury, I prefer to use a chocolate with a lower cocoa and higher sugar content. Something around 50-60% cocoa solids is ideal for me, but you can go sweeter with something like Cadbury’s Bourneville, or darker with a 70 or 85% dark chocolate. It’s much better to vary the sweetness of the chocolate rather than adding sugar or syrup to the ganache, as this can cause it to split.
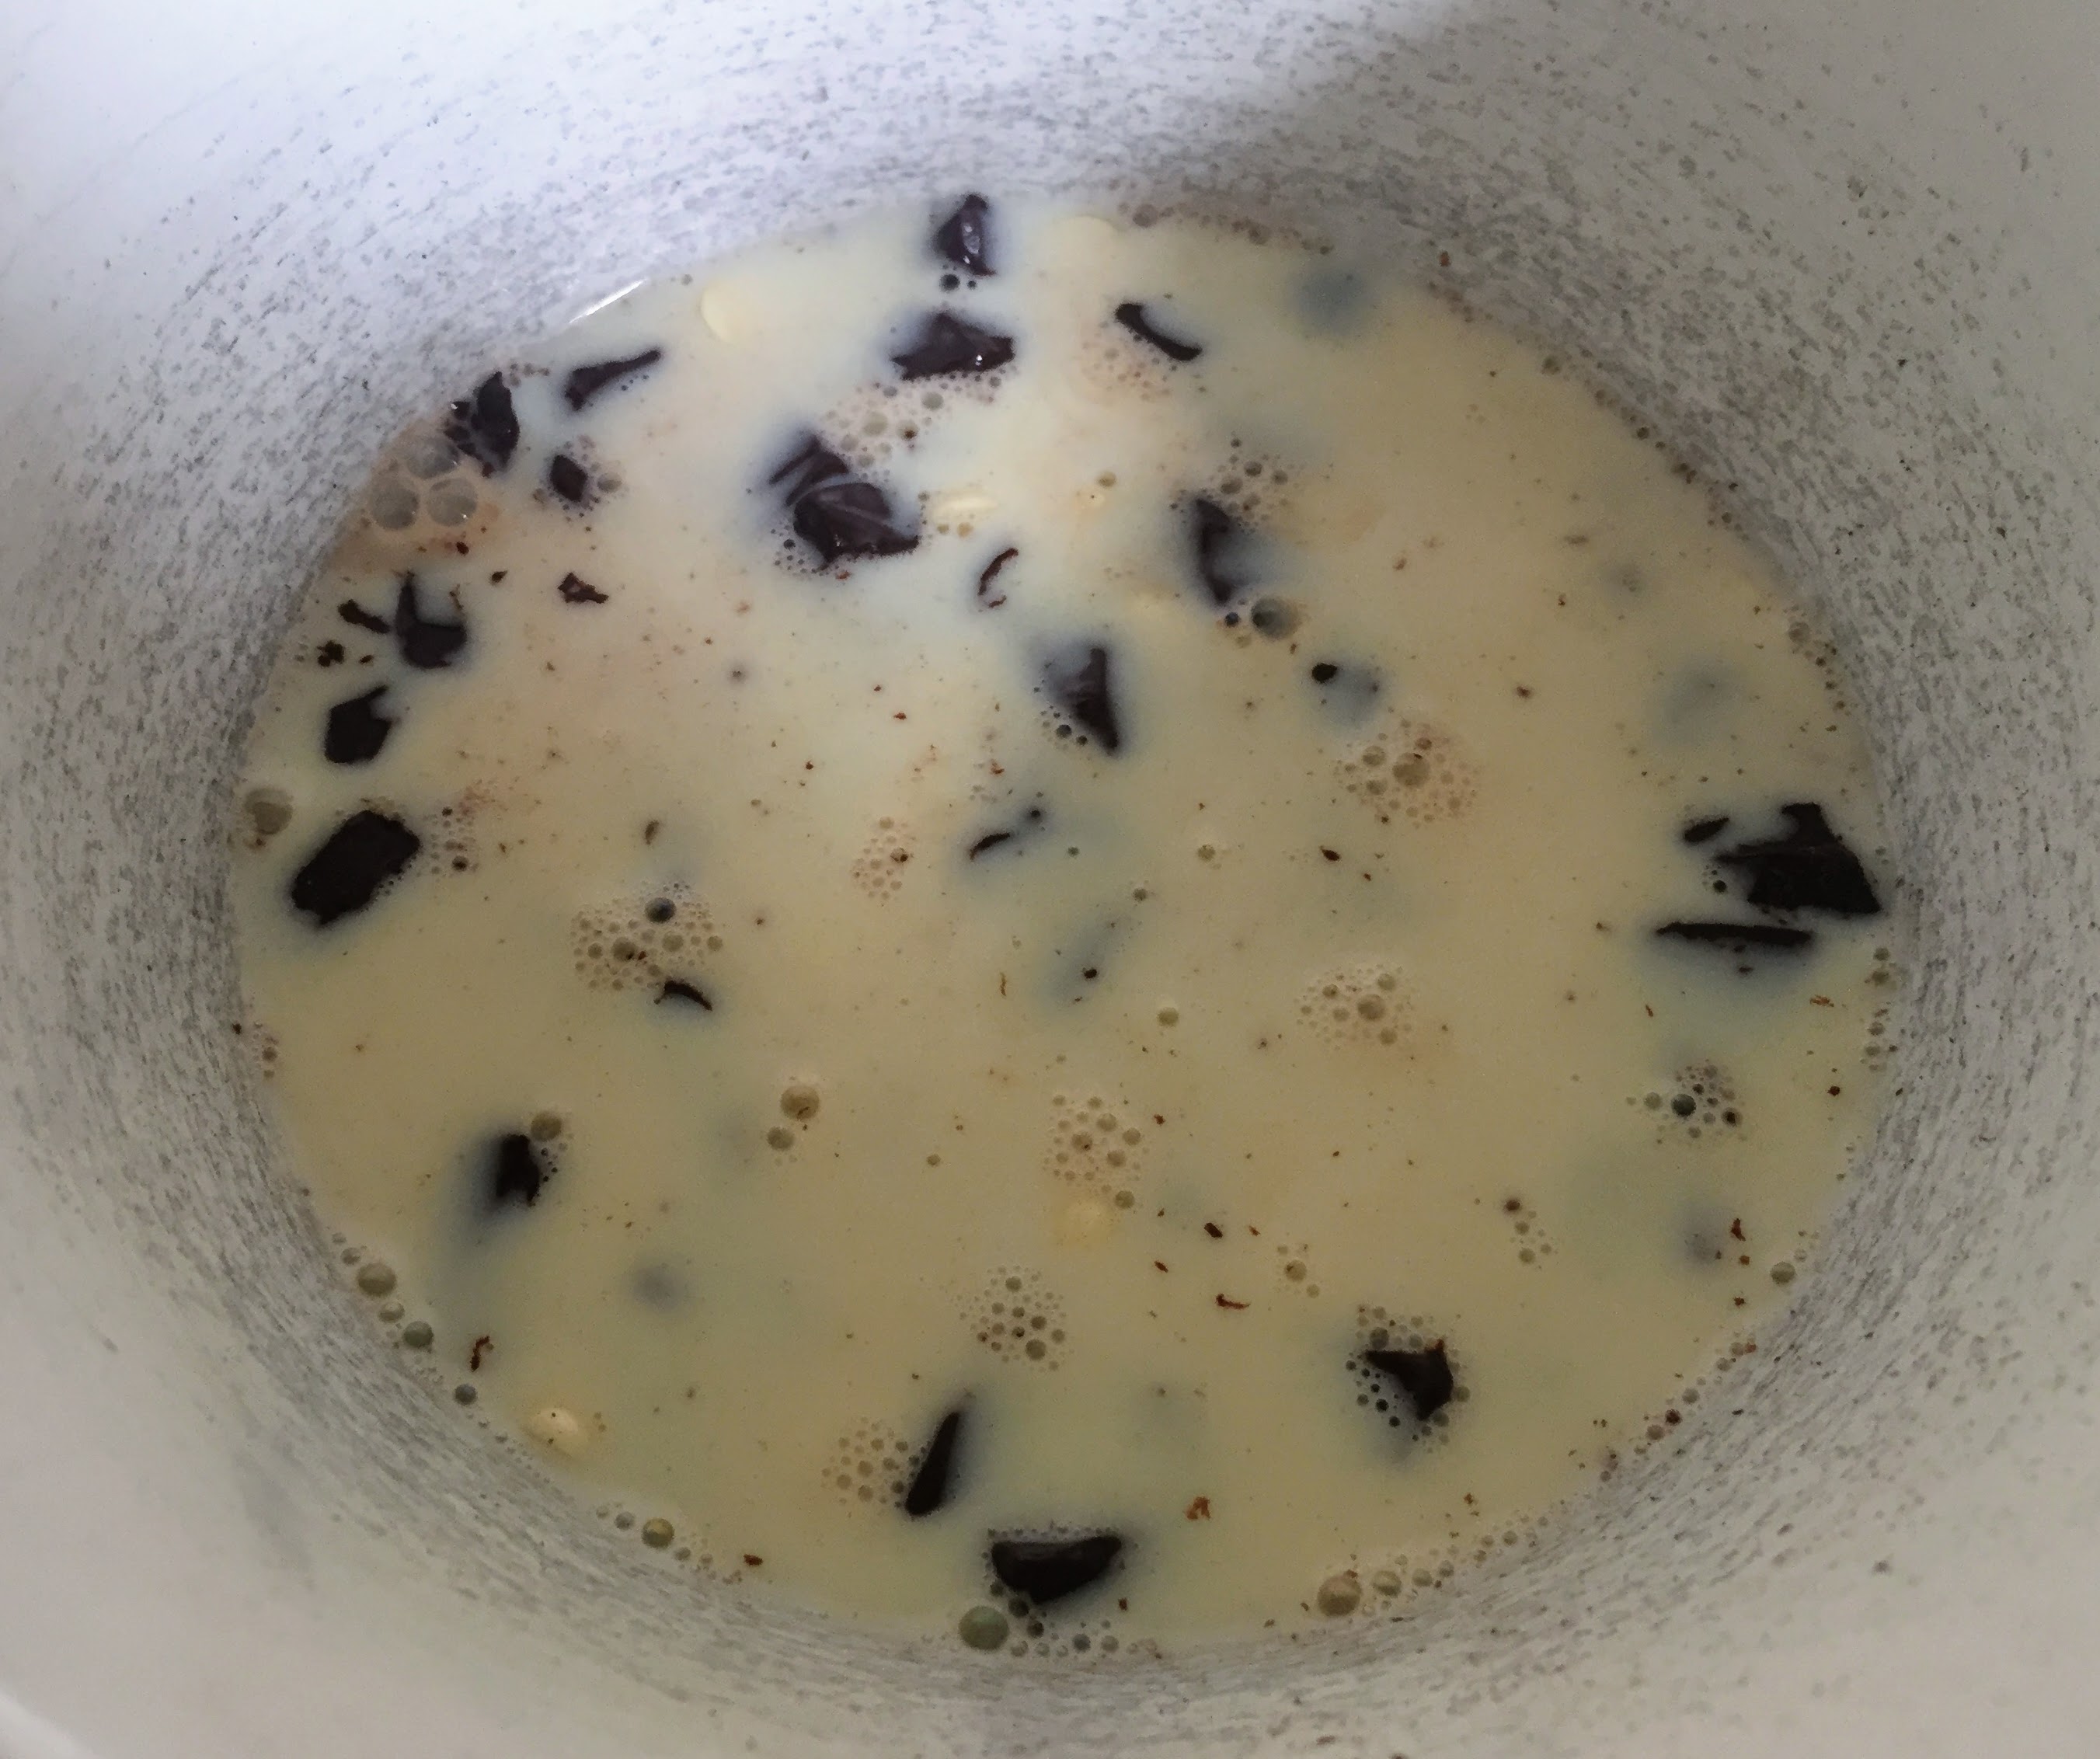
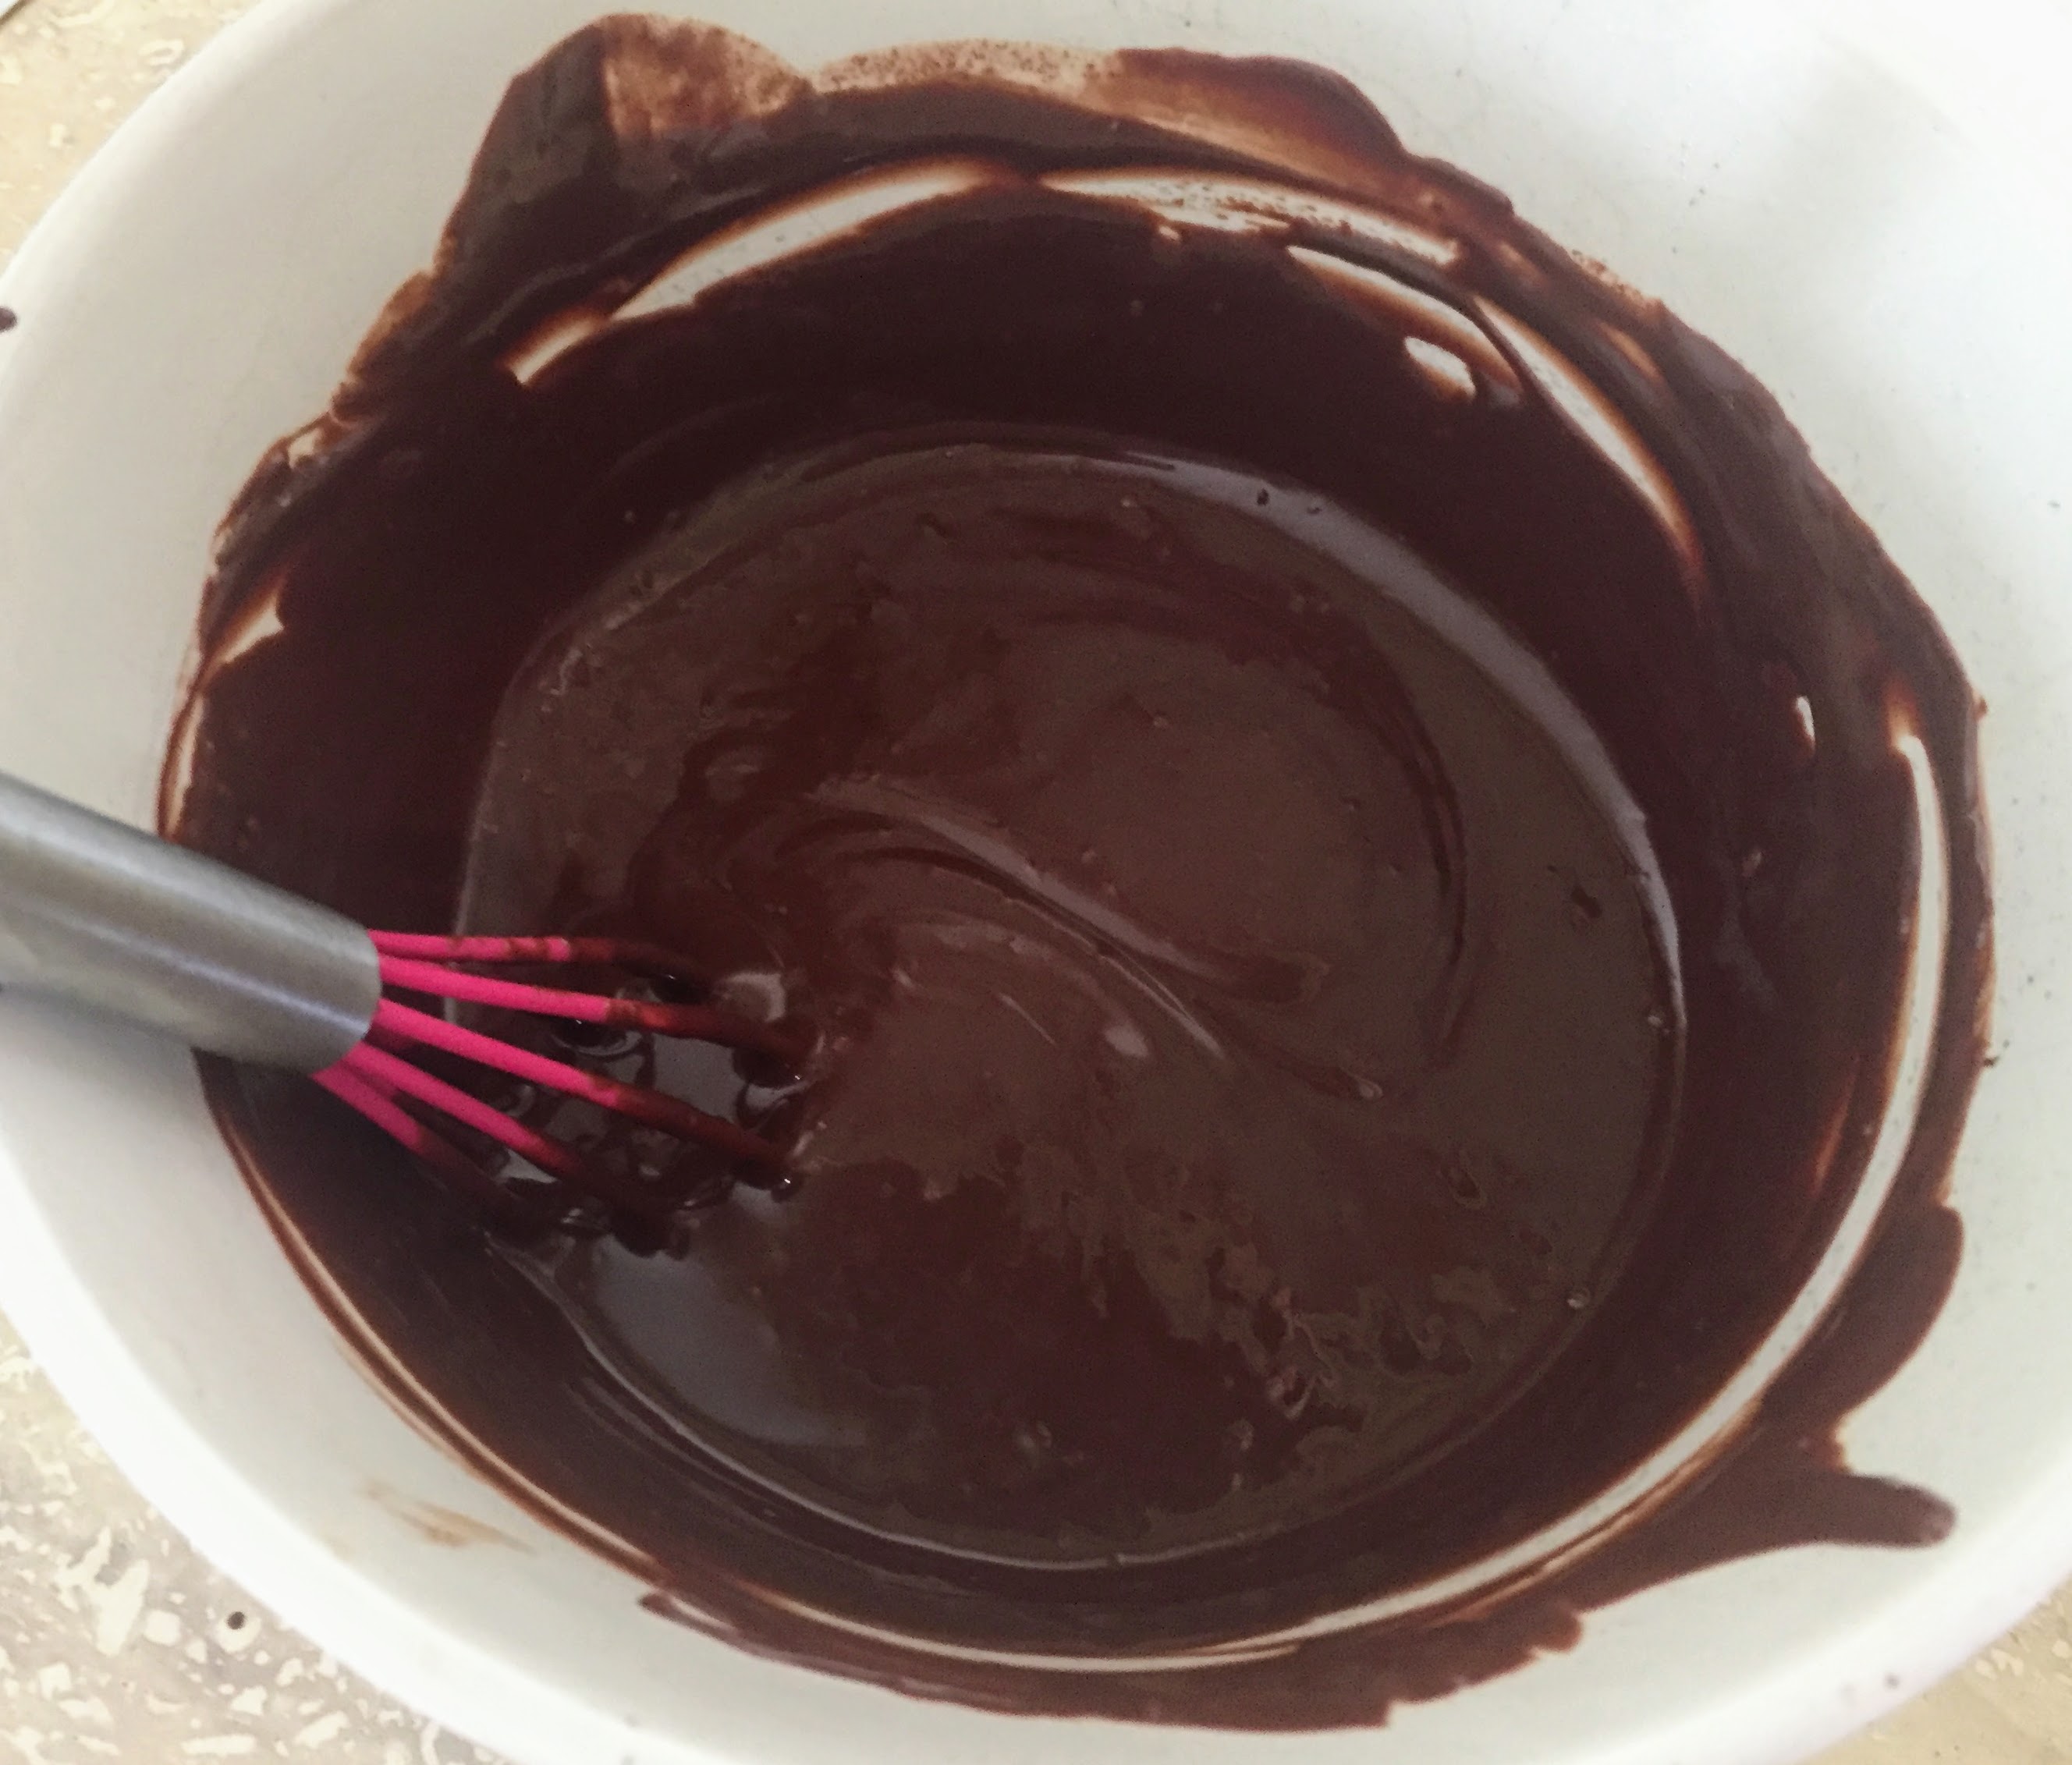
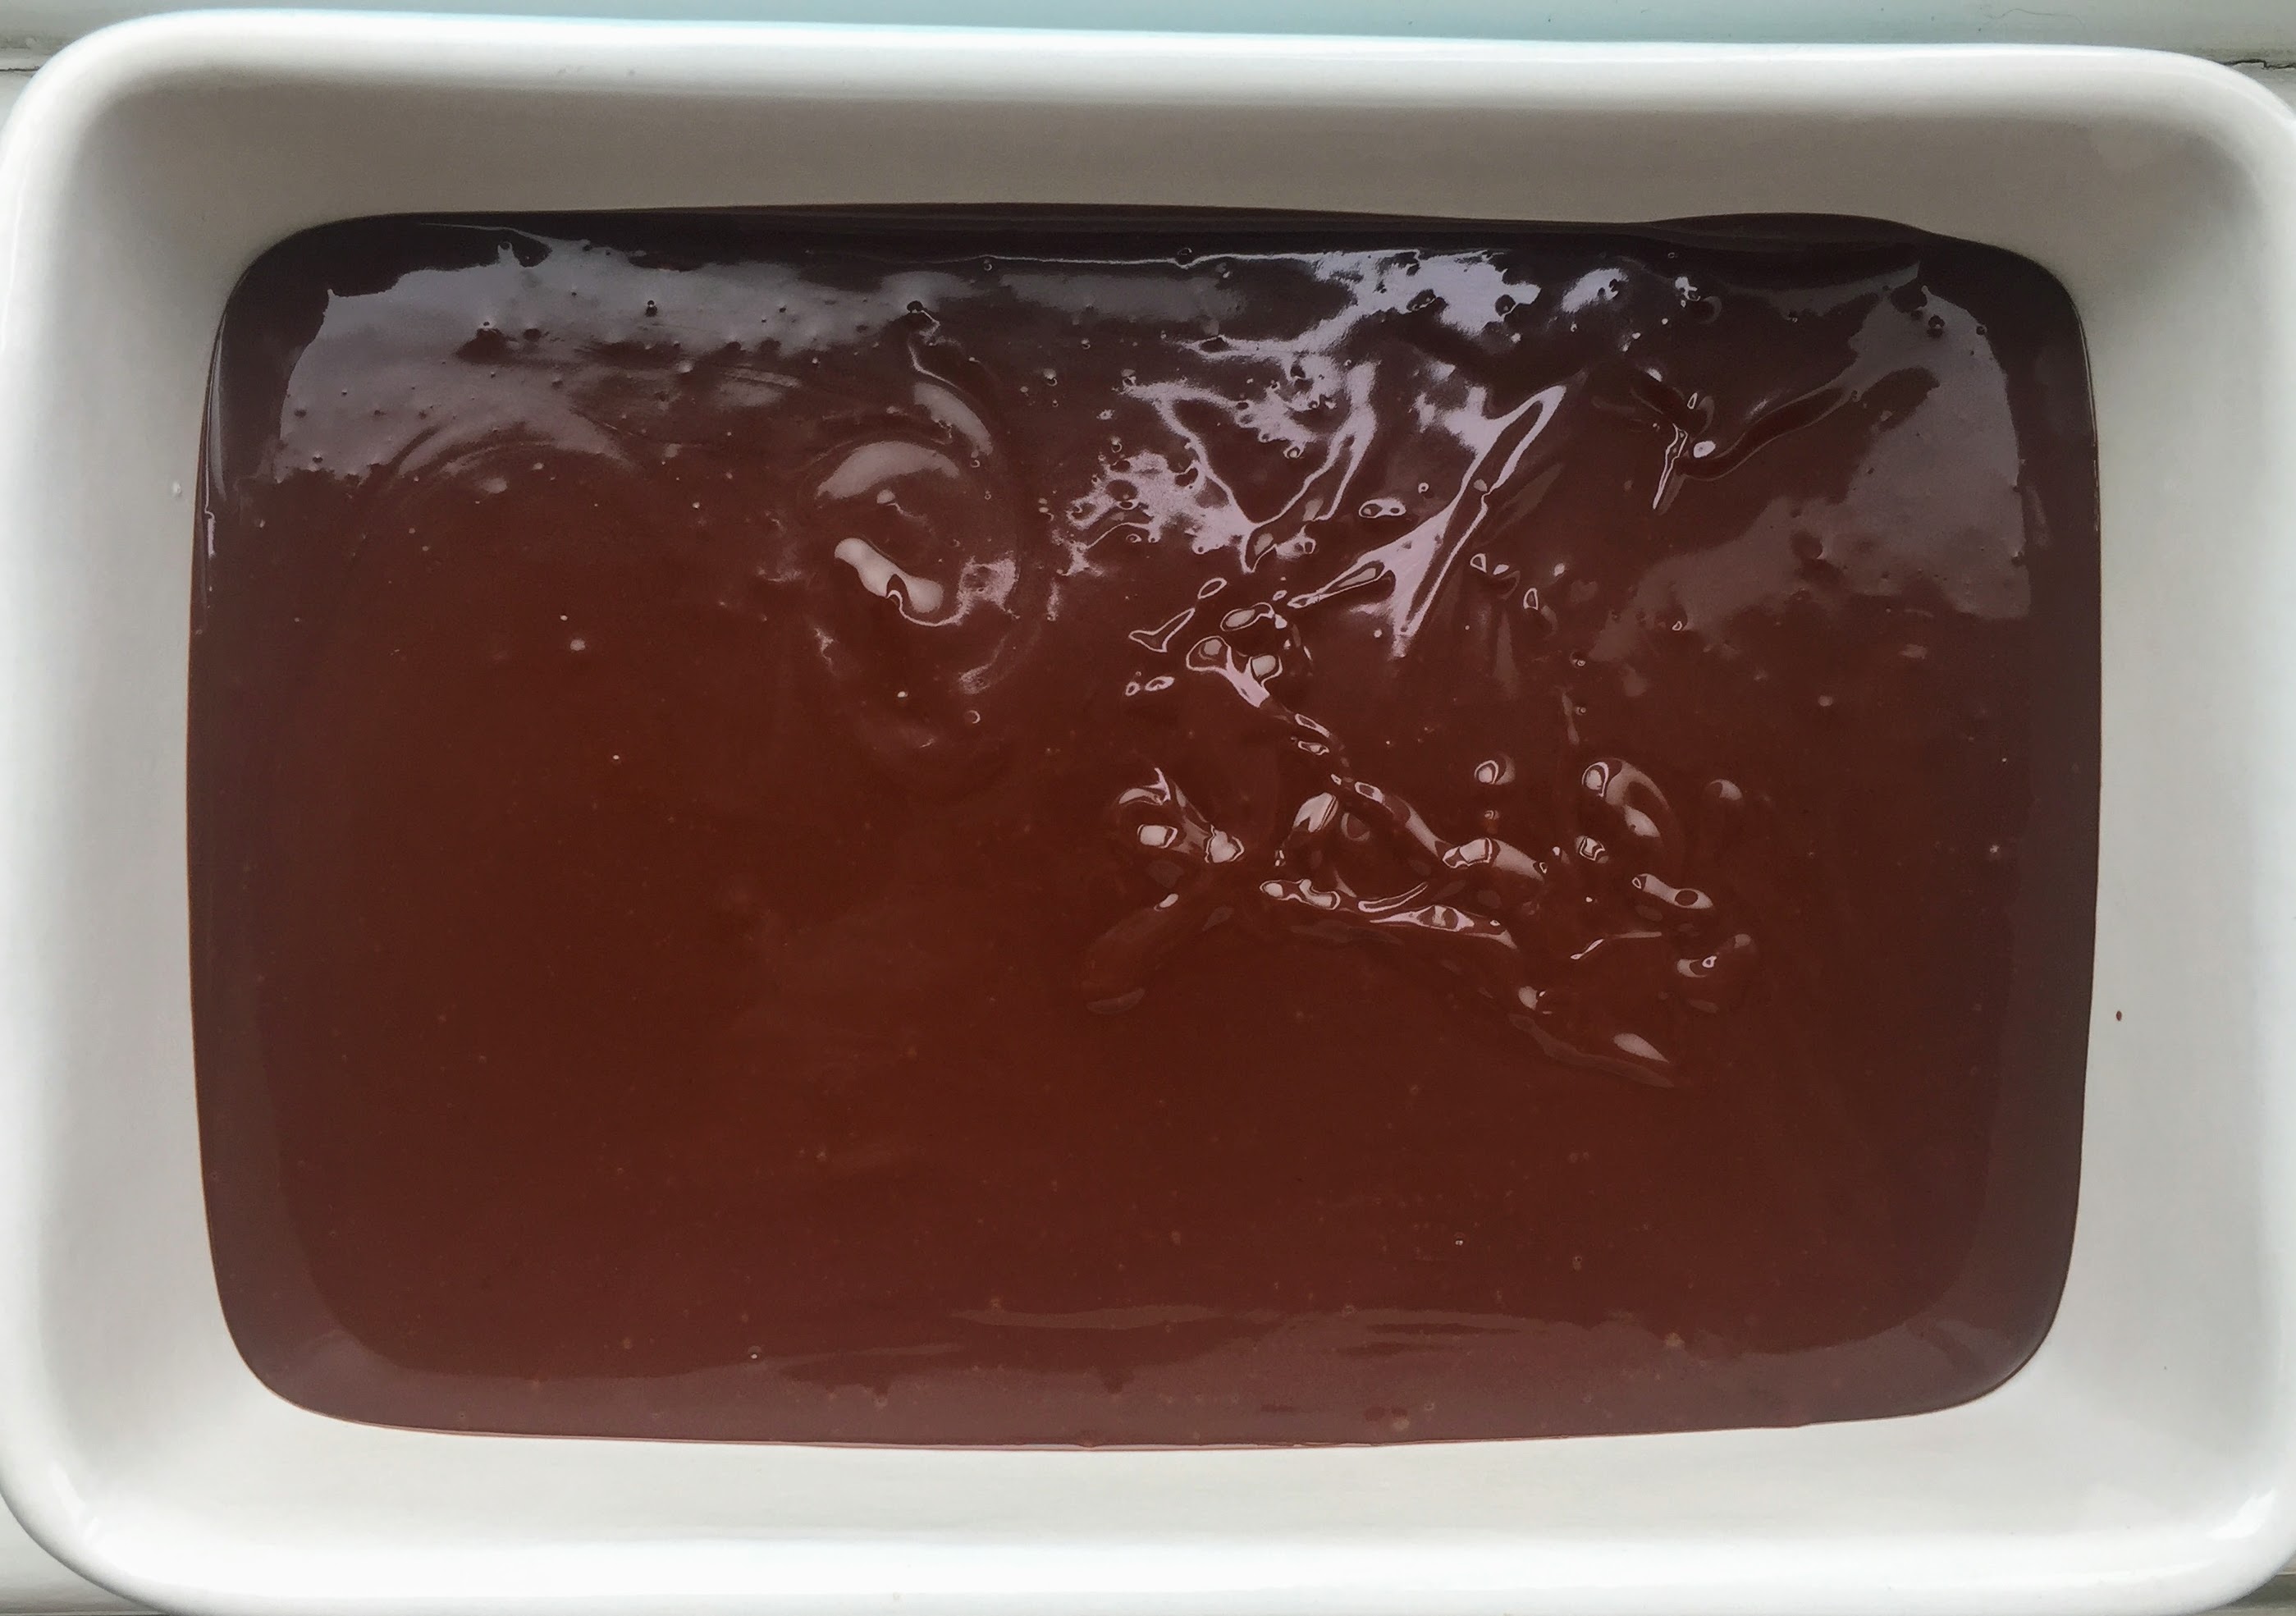
Whatever chocolate you chose, chop it very finely and place in a heat-proof bowl. Warm your non-dairy milk in a small saucepan over a medium heat. You want the milk to be hot but not boiling. When there’s plenty of steam rising from the milk, pour it over the chopped chocolate and leave it, undisturbed, for 5 minutes. Then stir with a whisk or spoon until you have a thick and glossy chocolate sauce, and add a pinch of salt to taste. If there are still some lumps of chocolate, you can blast in the microwave for 10 seconds at a time and stir thoroughly until they have all melted. Then place in the fridge – the chocolate will firm up much quicker if spread over a greater surface area; a small casserole dish or shallow bowl is ideal.
Once the dough has doubled in size, it’s time to shape the bao. I make sure I have cut out 16 squares of baking paper (7 or 8 cm squared) and have a baking tray and clean tea towel ready, as well as a small bowl of water, a knife, a rolling pin, the ganache from the fridge, a tablespoon measure, and a clean damp cloth. Tip the dough onto a lightly floured surface and knock out the air, then cut the dough into two equal pieces, and each piece in half again. Place three pieces back in the proving bowl under the damp cloth, and roll the fourth into a sausage shape. Score with the knife into four equal pieces, and separate each section with your hands (this will make it easier to roll each piece into a ball than if you use the knife). I’d recommend keeping everything except the piece of dough you are working on under a damp cloth; it will prevent the dough from drying out and makes it easier to work with.
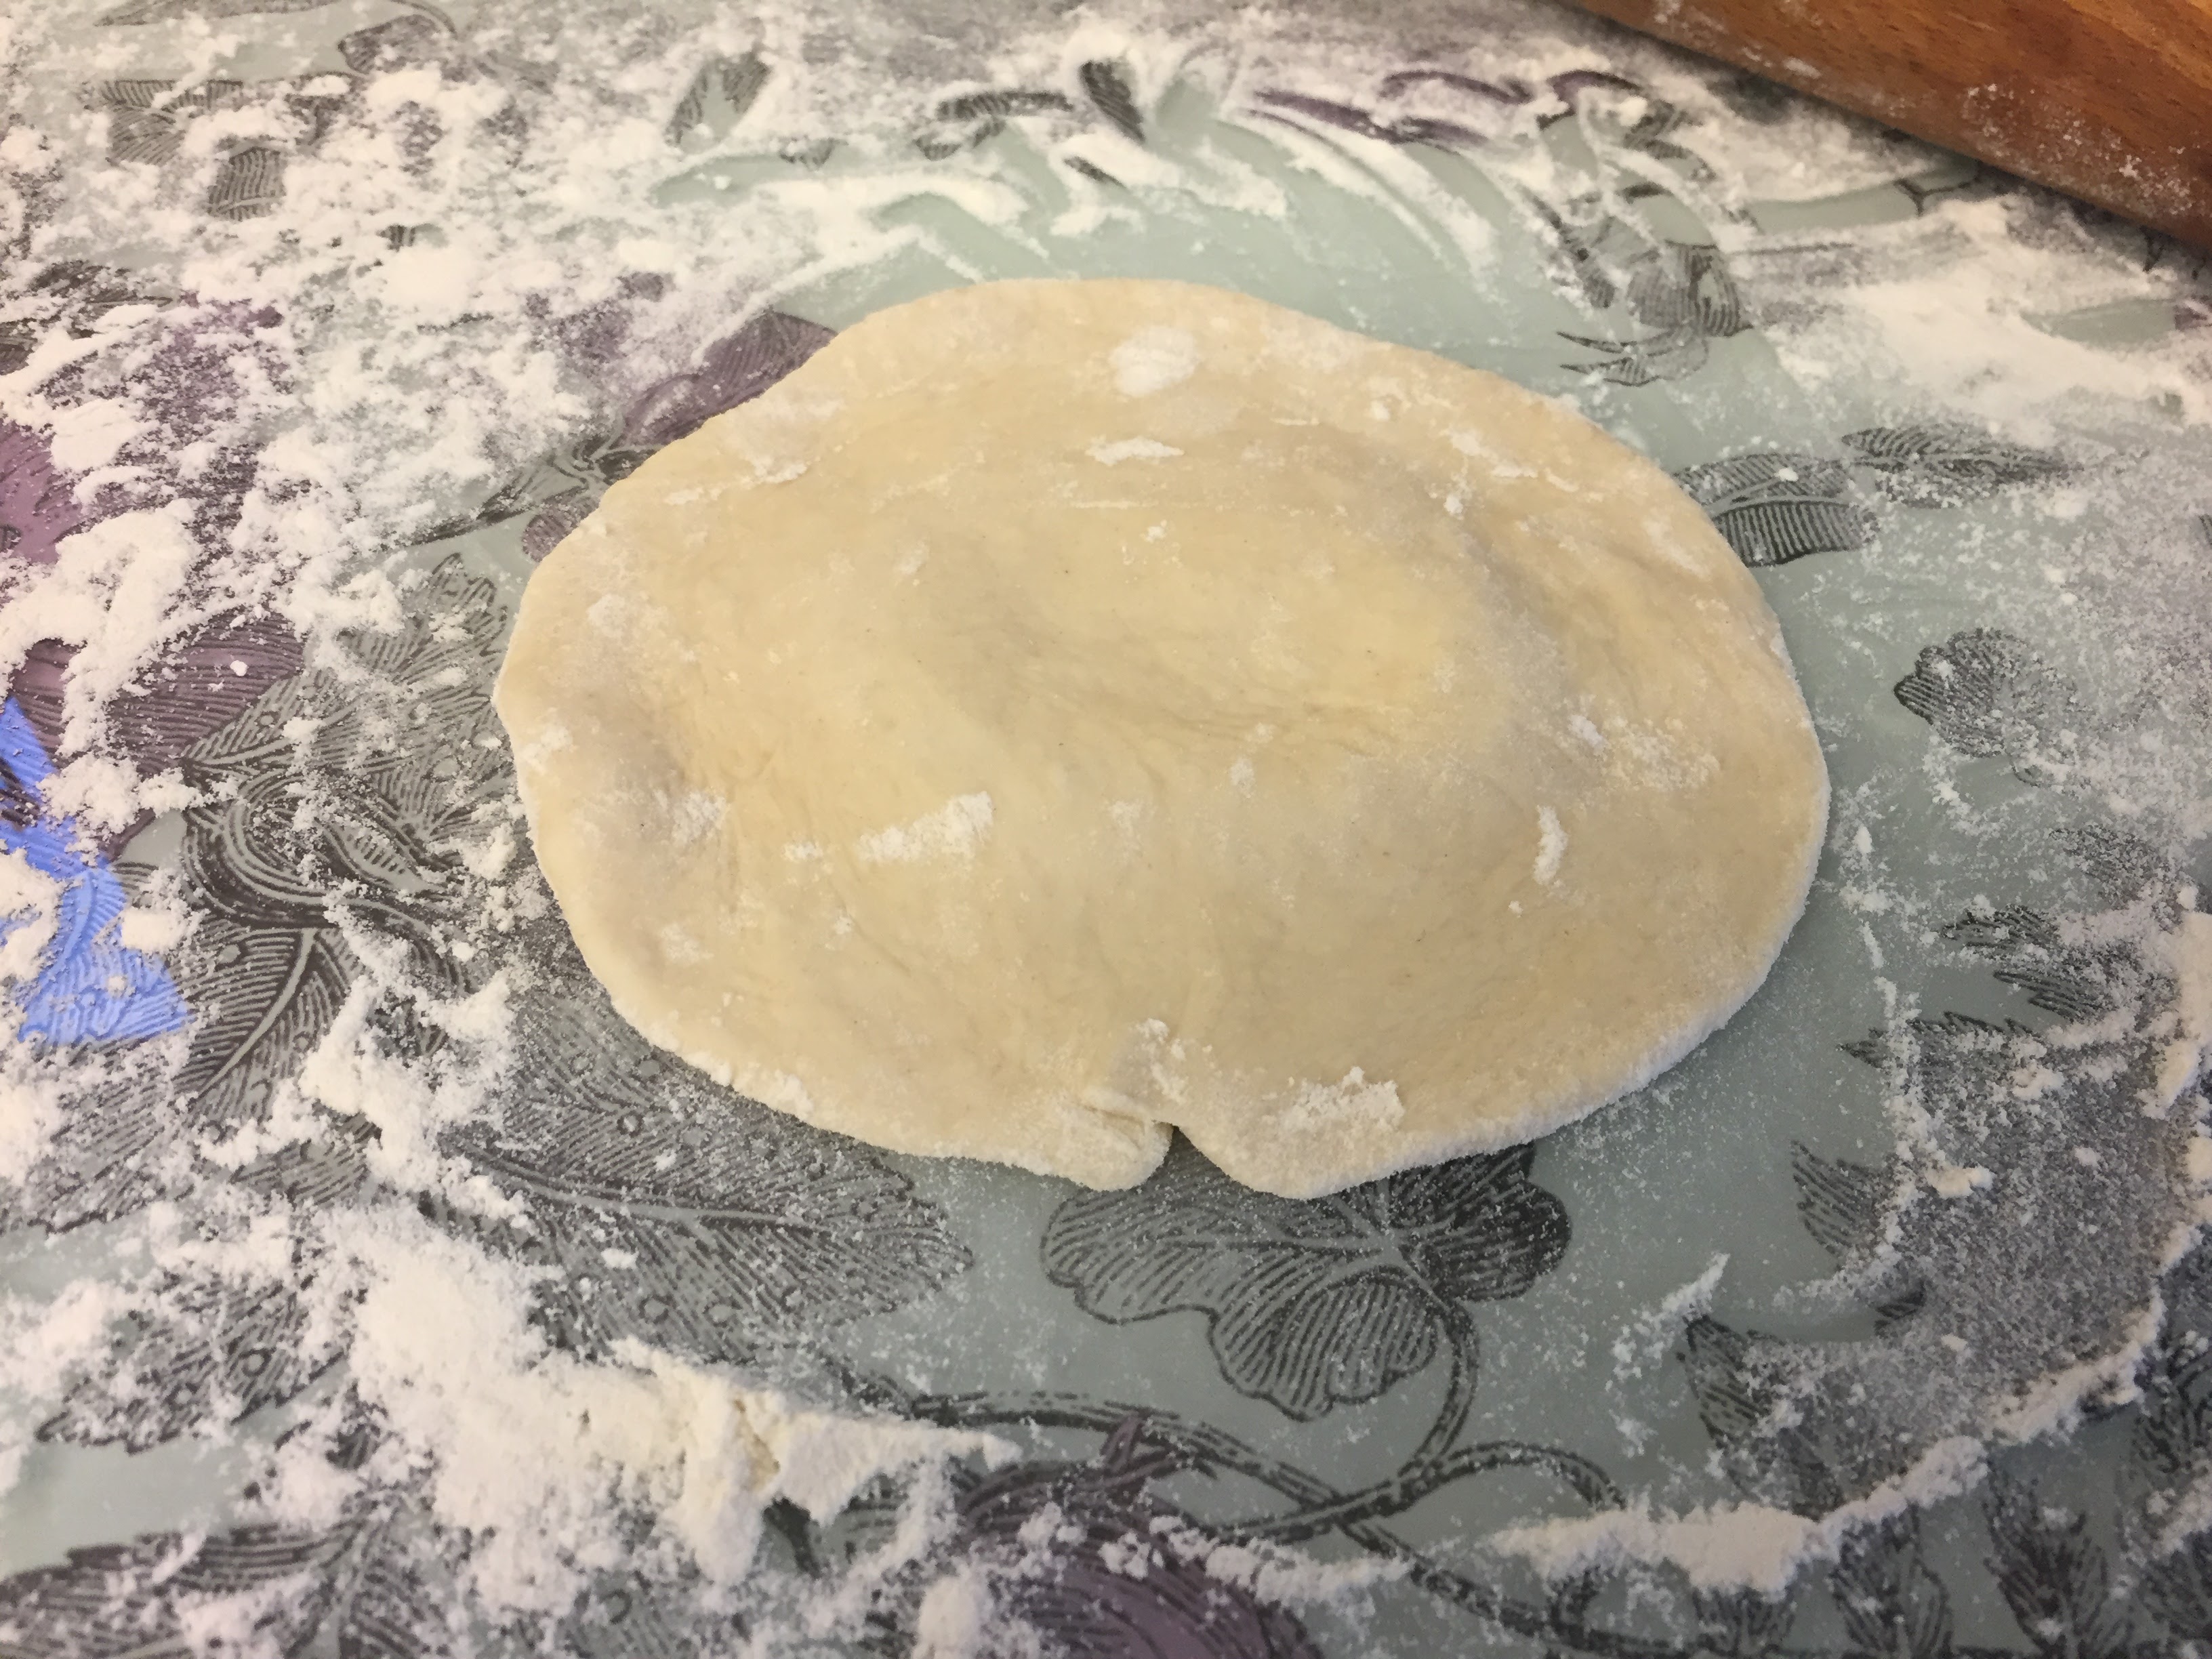
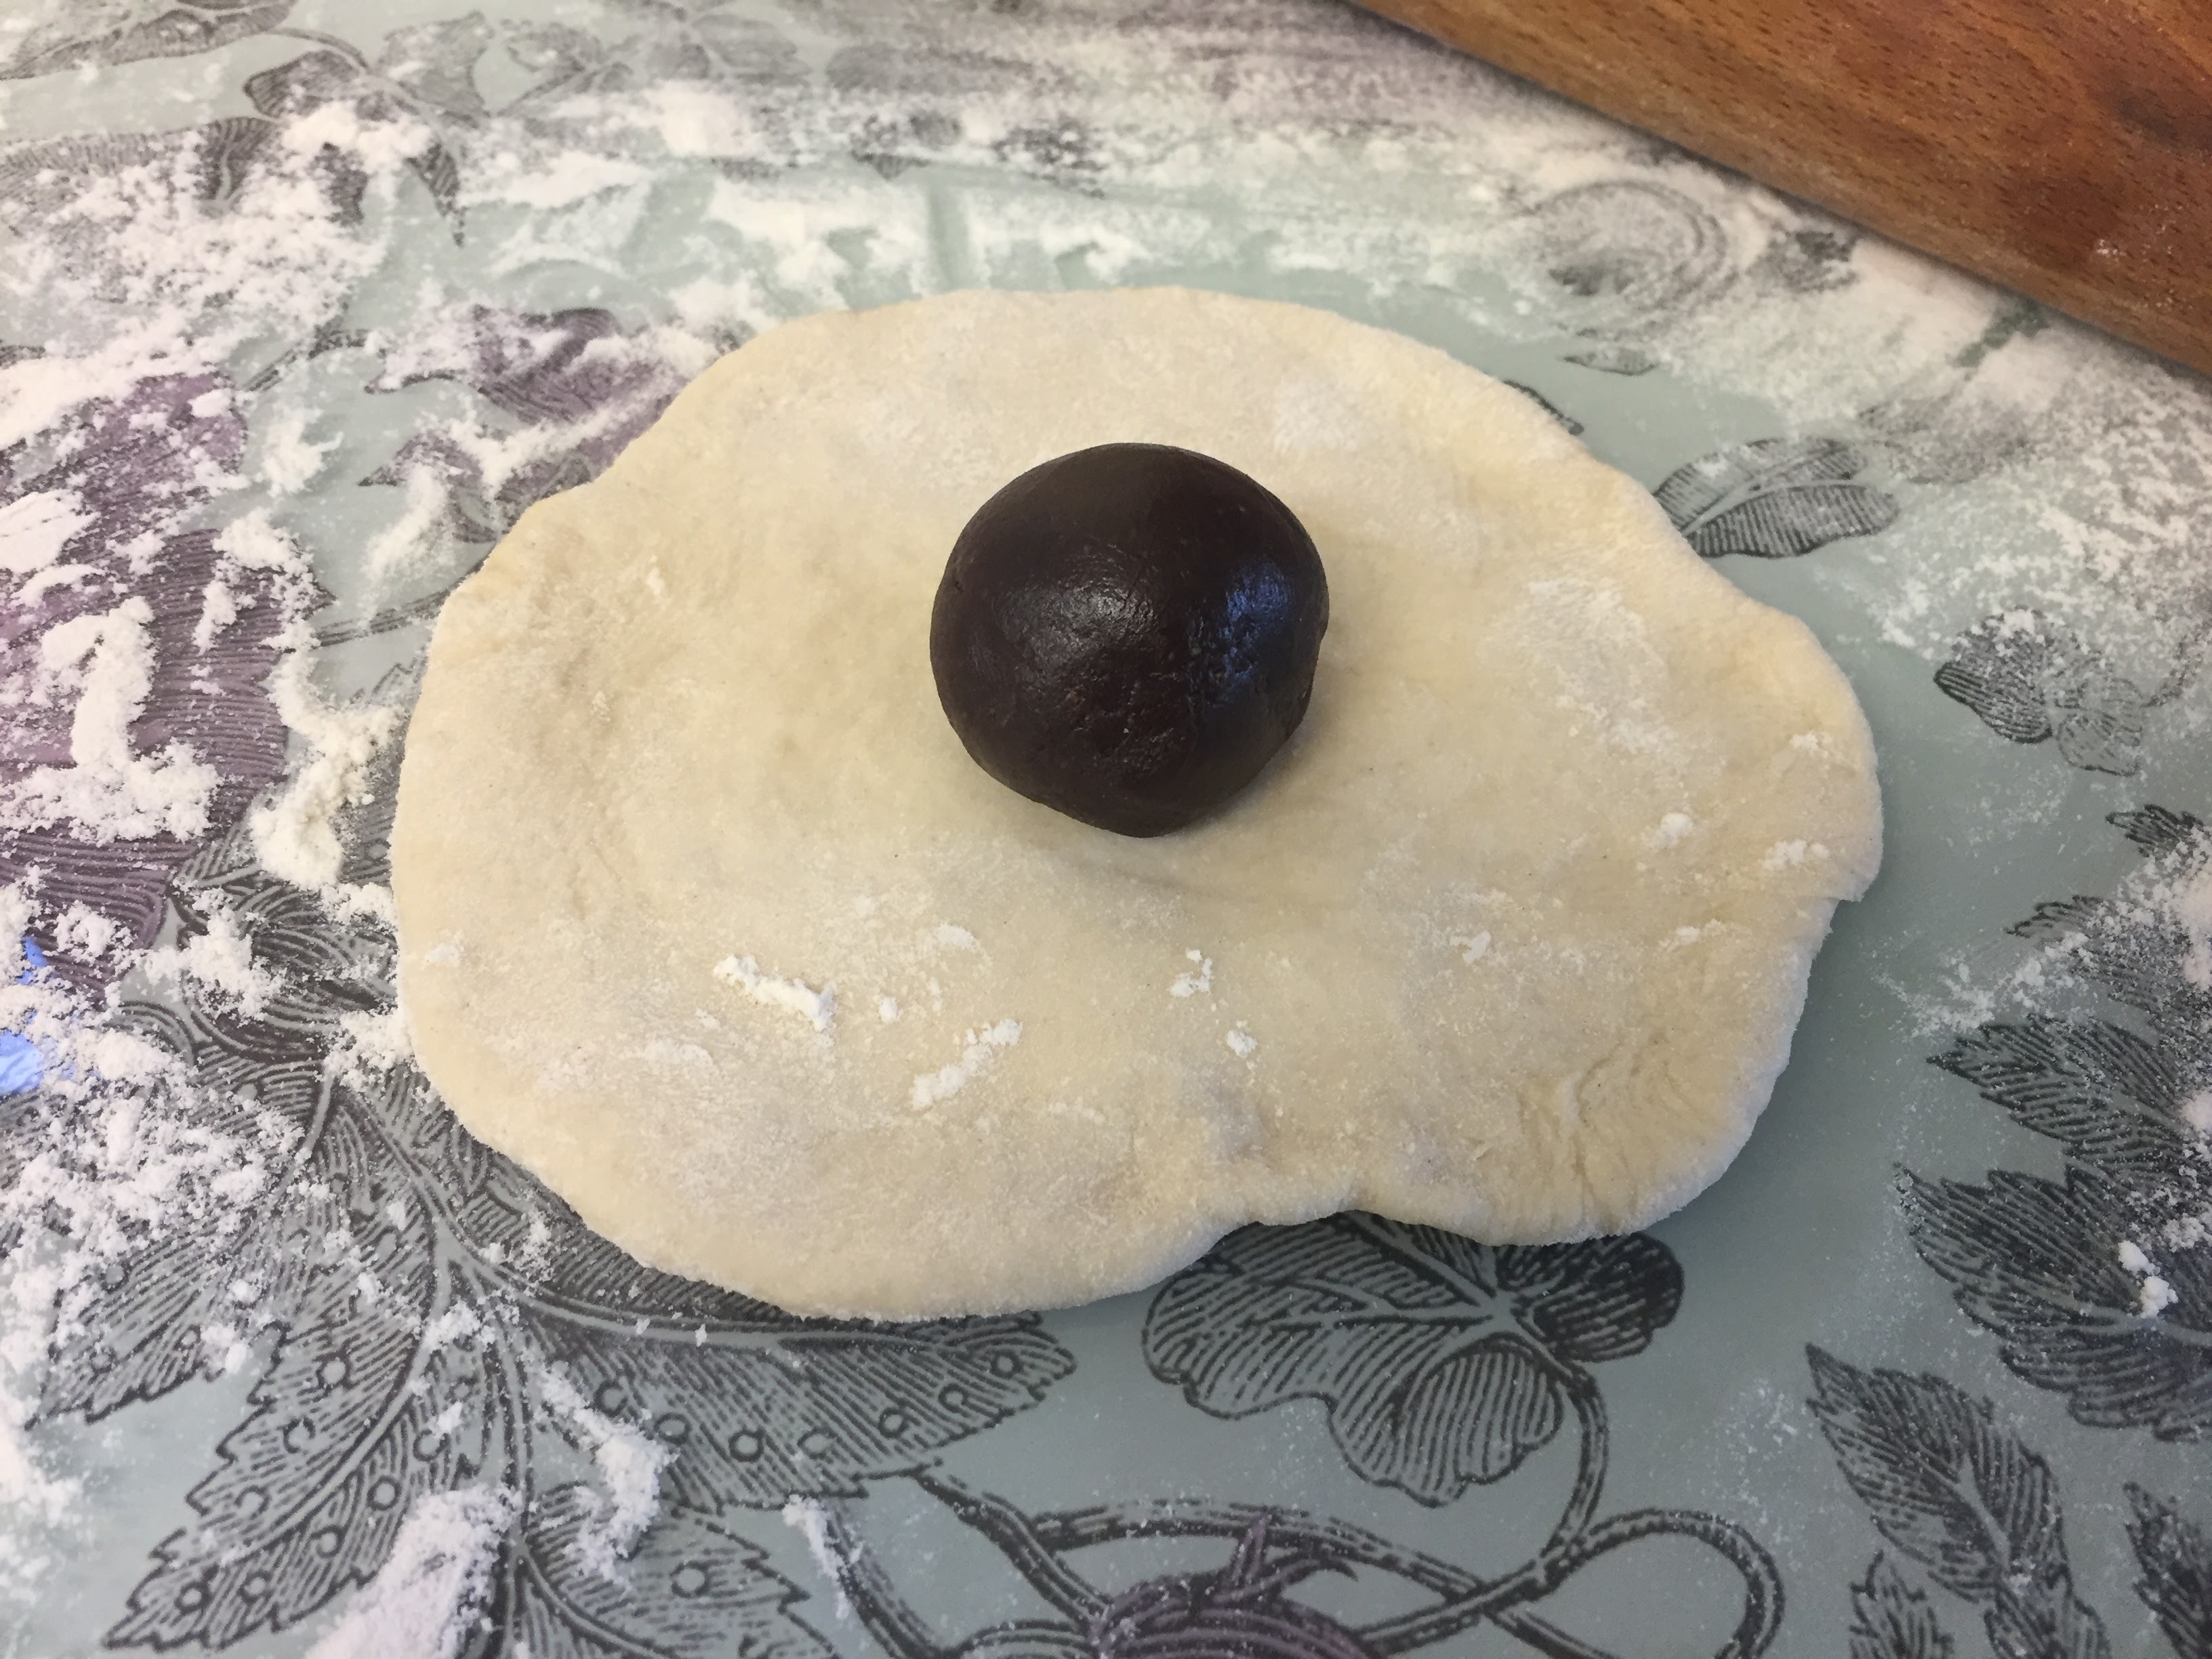
With each small piece of dough, roll it into a ball and flatten slightly with the palm of your hand. Roll into a small circle with the rolling pin (roll the centre of the dough out leaving the top and bottom a little thicker, then turn 45 degrees and do the same, and repeat until you have a circle). Then go around the edge of the circle with the rolling pin, rolling out the edges and leaving a thicker disc in the middle; a bit like a fried egg. Scoop a level tablespoon of ganache and place in the middle of the dough, then lift the entire thing into the palm of one hand and pleat the edges around the ganache with the other.
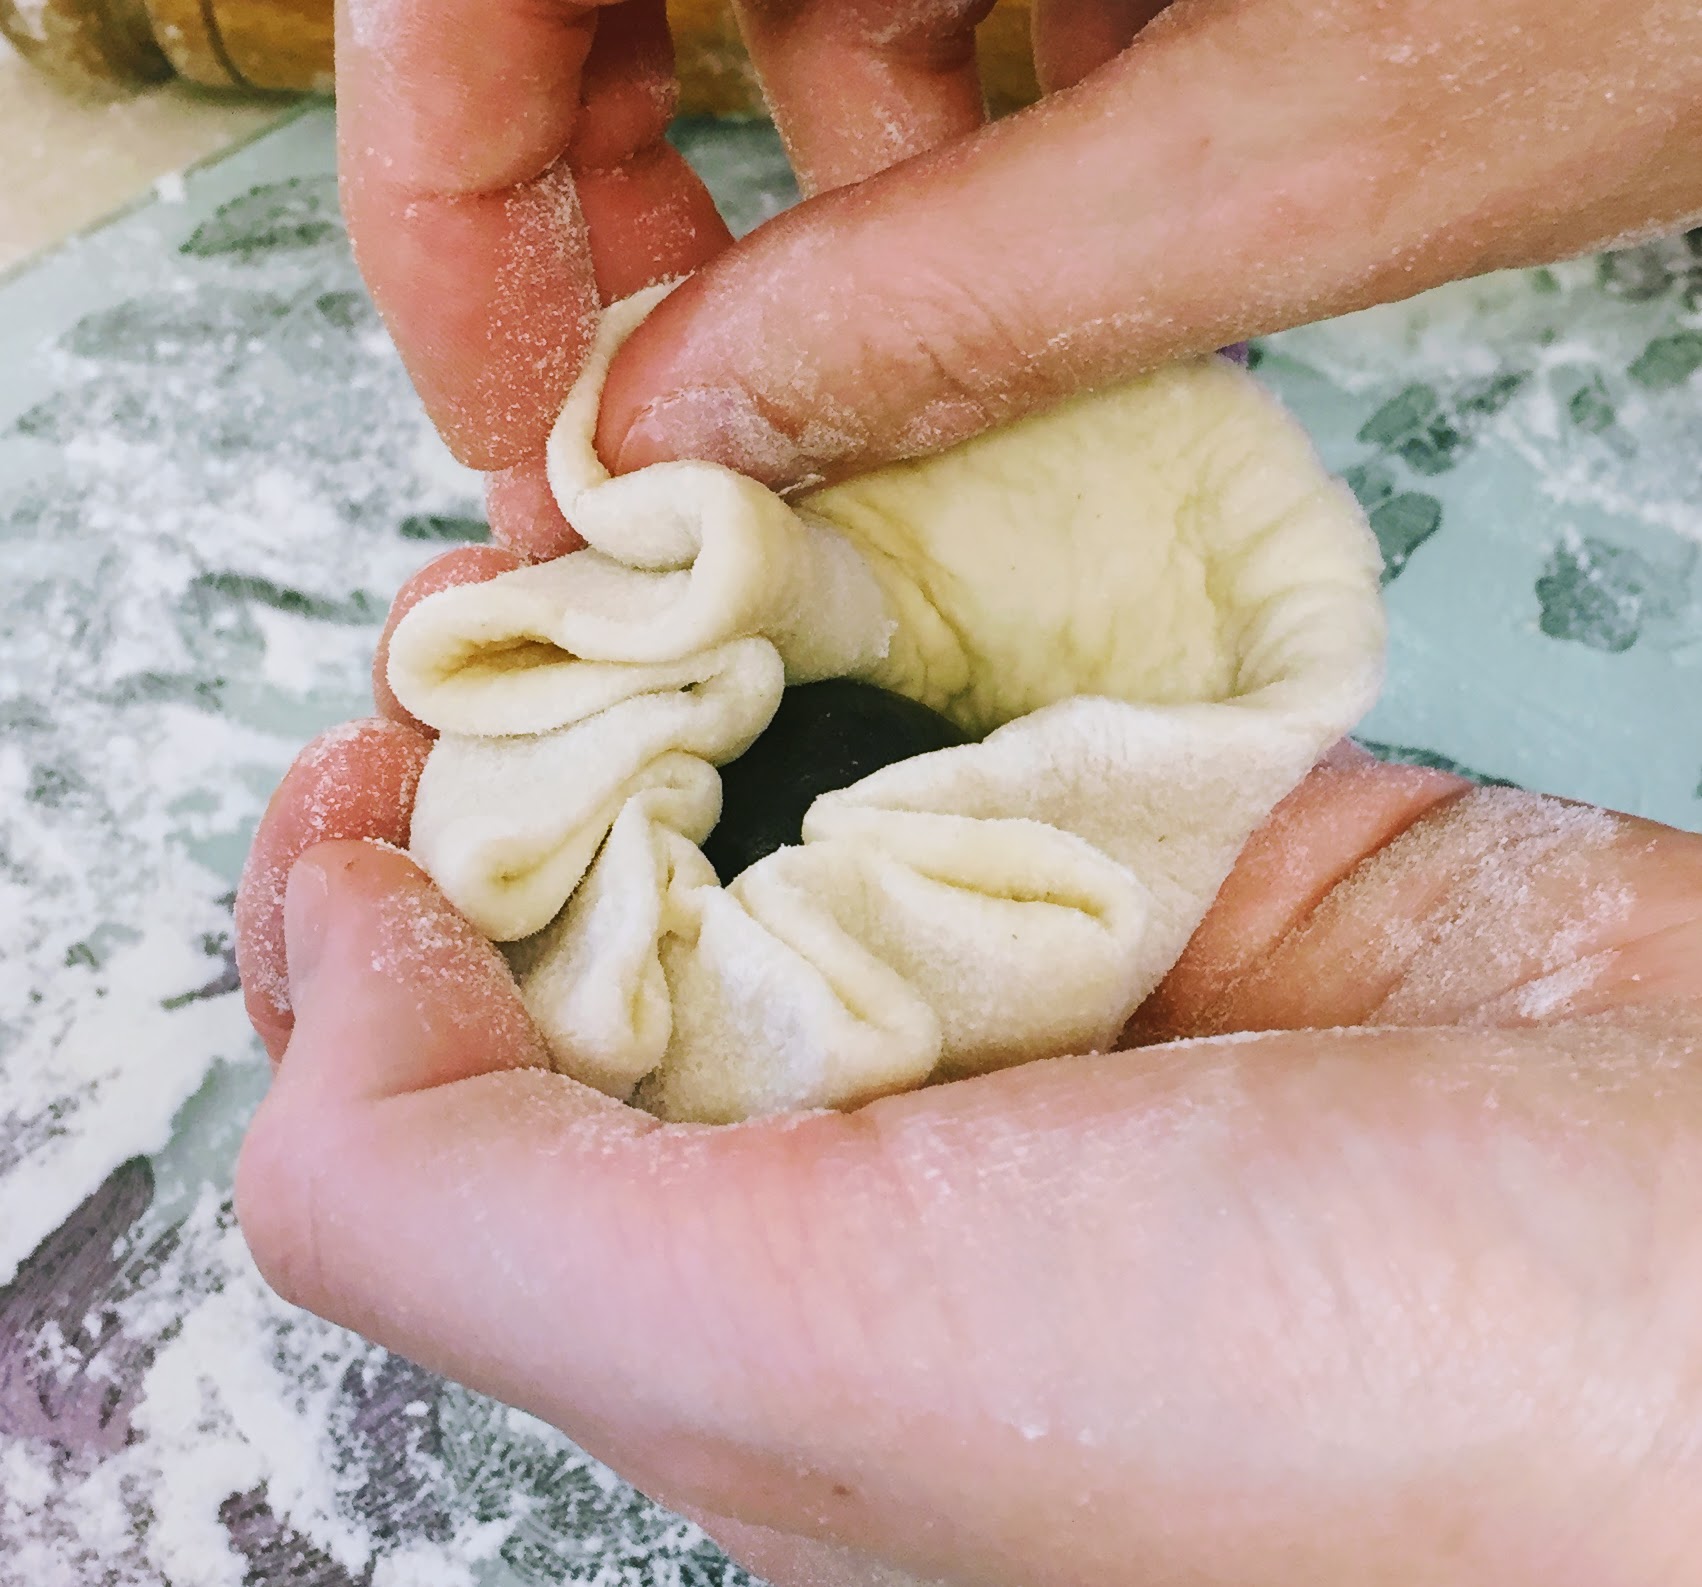
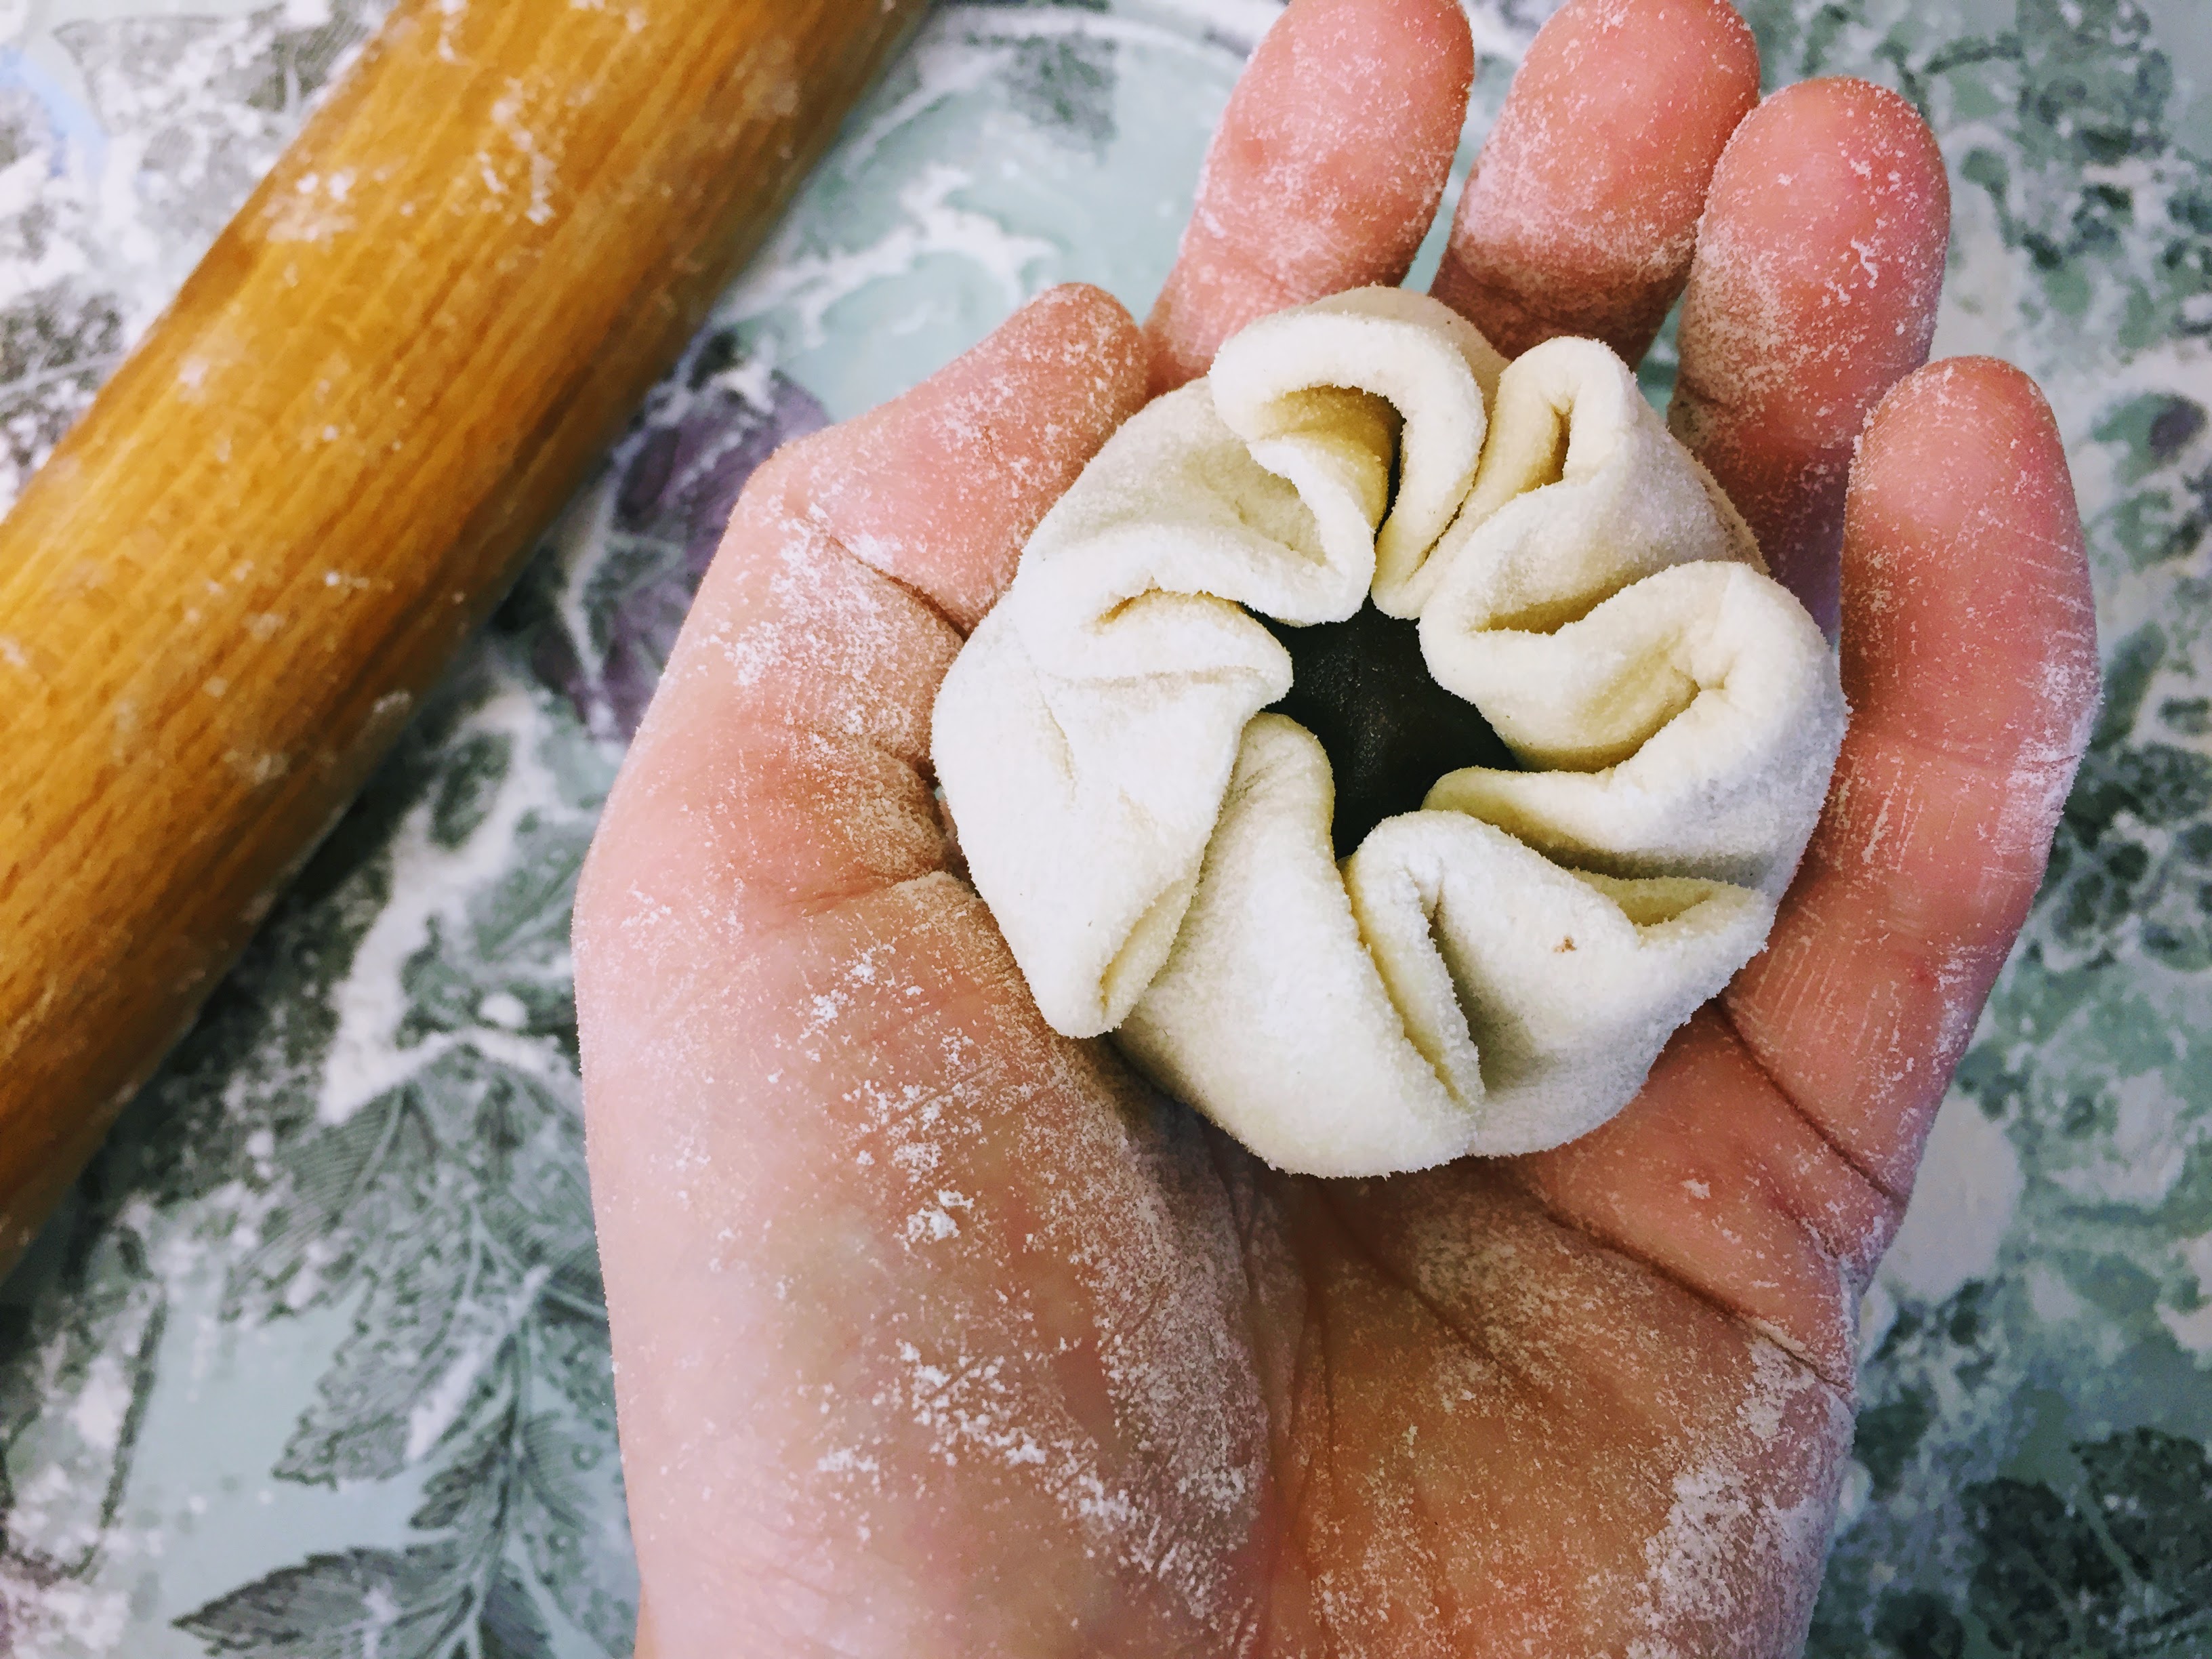
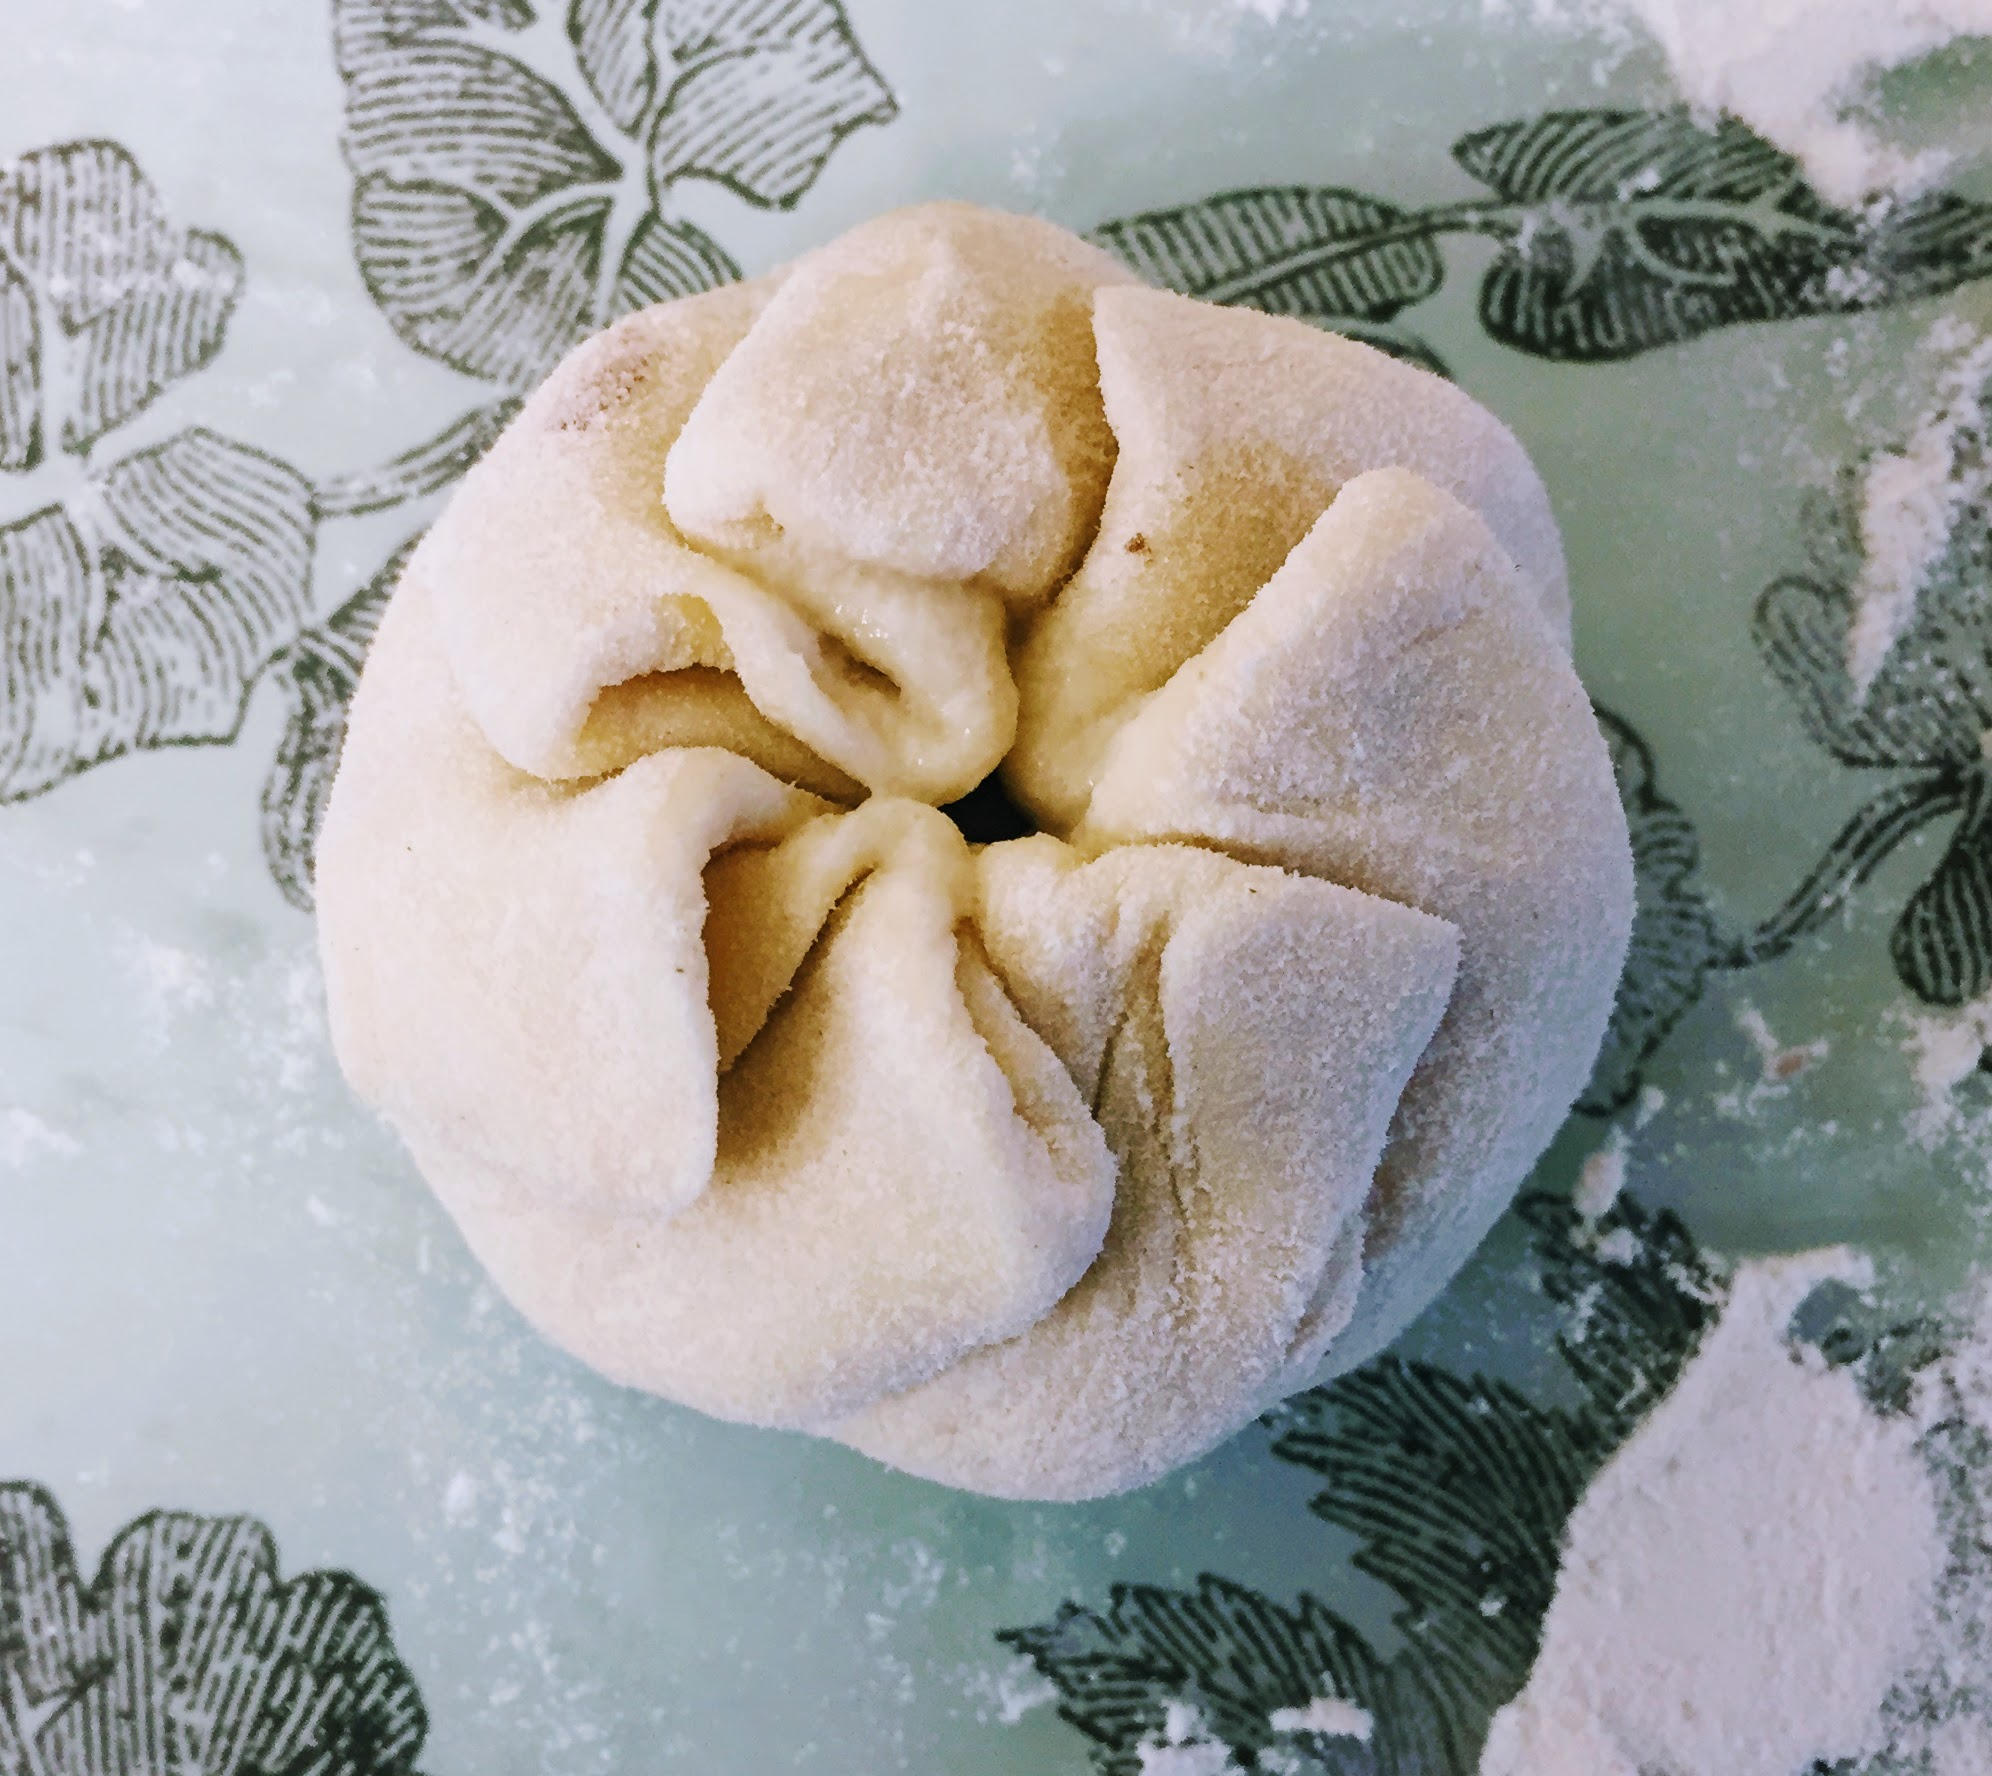
Finally, dab a tiny amount of water on the edge of the pleats, and bring them together by twisting them slightly in the direction the pleats are going (e.g. on the bun in the pictures I would twist it anti-clockwise). Often my pleats will look like a complete mess and then when I twist them slightly they suddenly look competent, but they won’t be on show so you needn’t worry about getting them perfect. If there’s still a little gap it doesn’t matter – it will close as it steams. Place pleat-side down on a square of baking paper on your baking tray, cover with a clean tea towel, and repeat with the remaining dough.
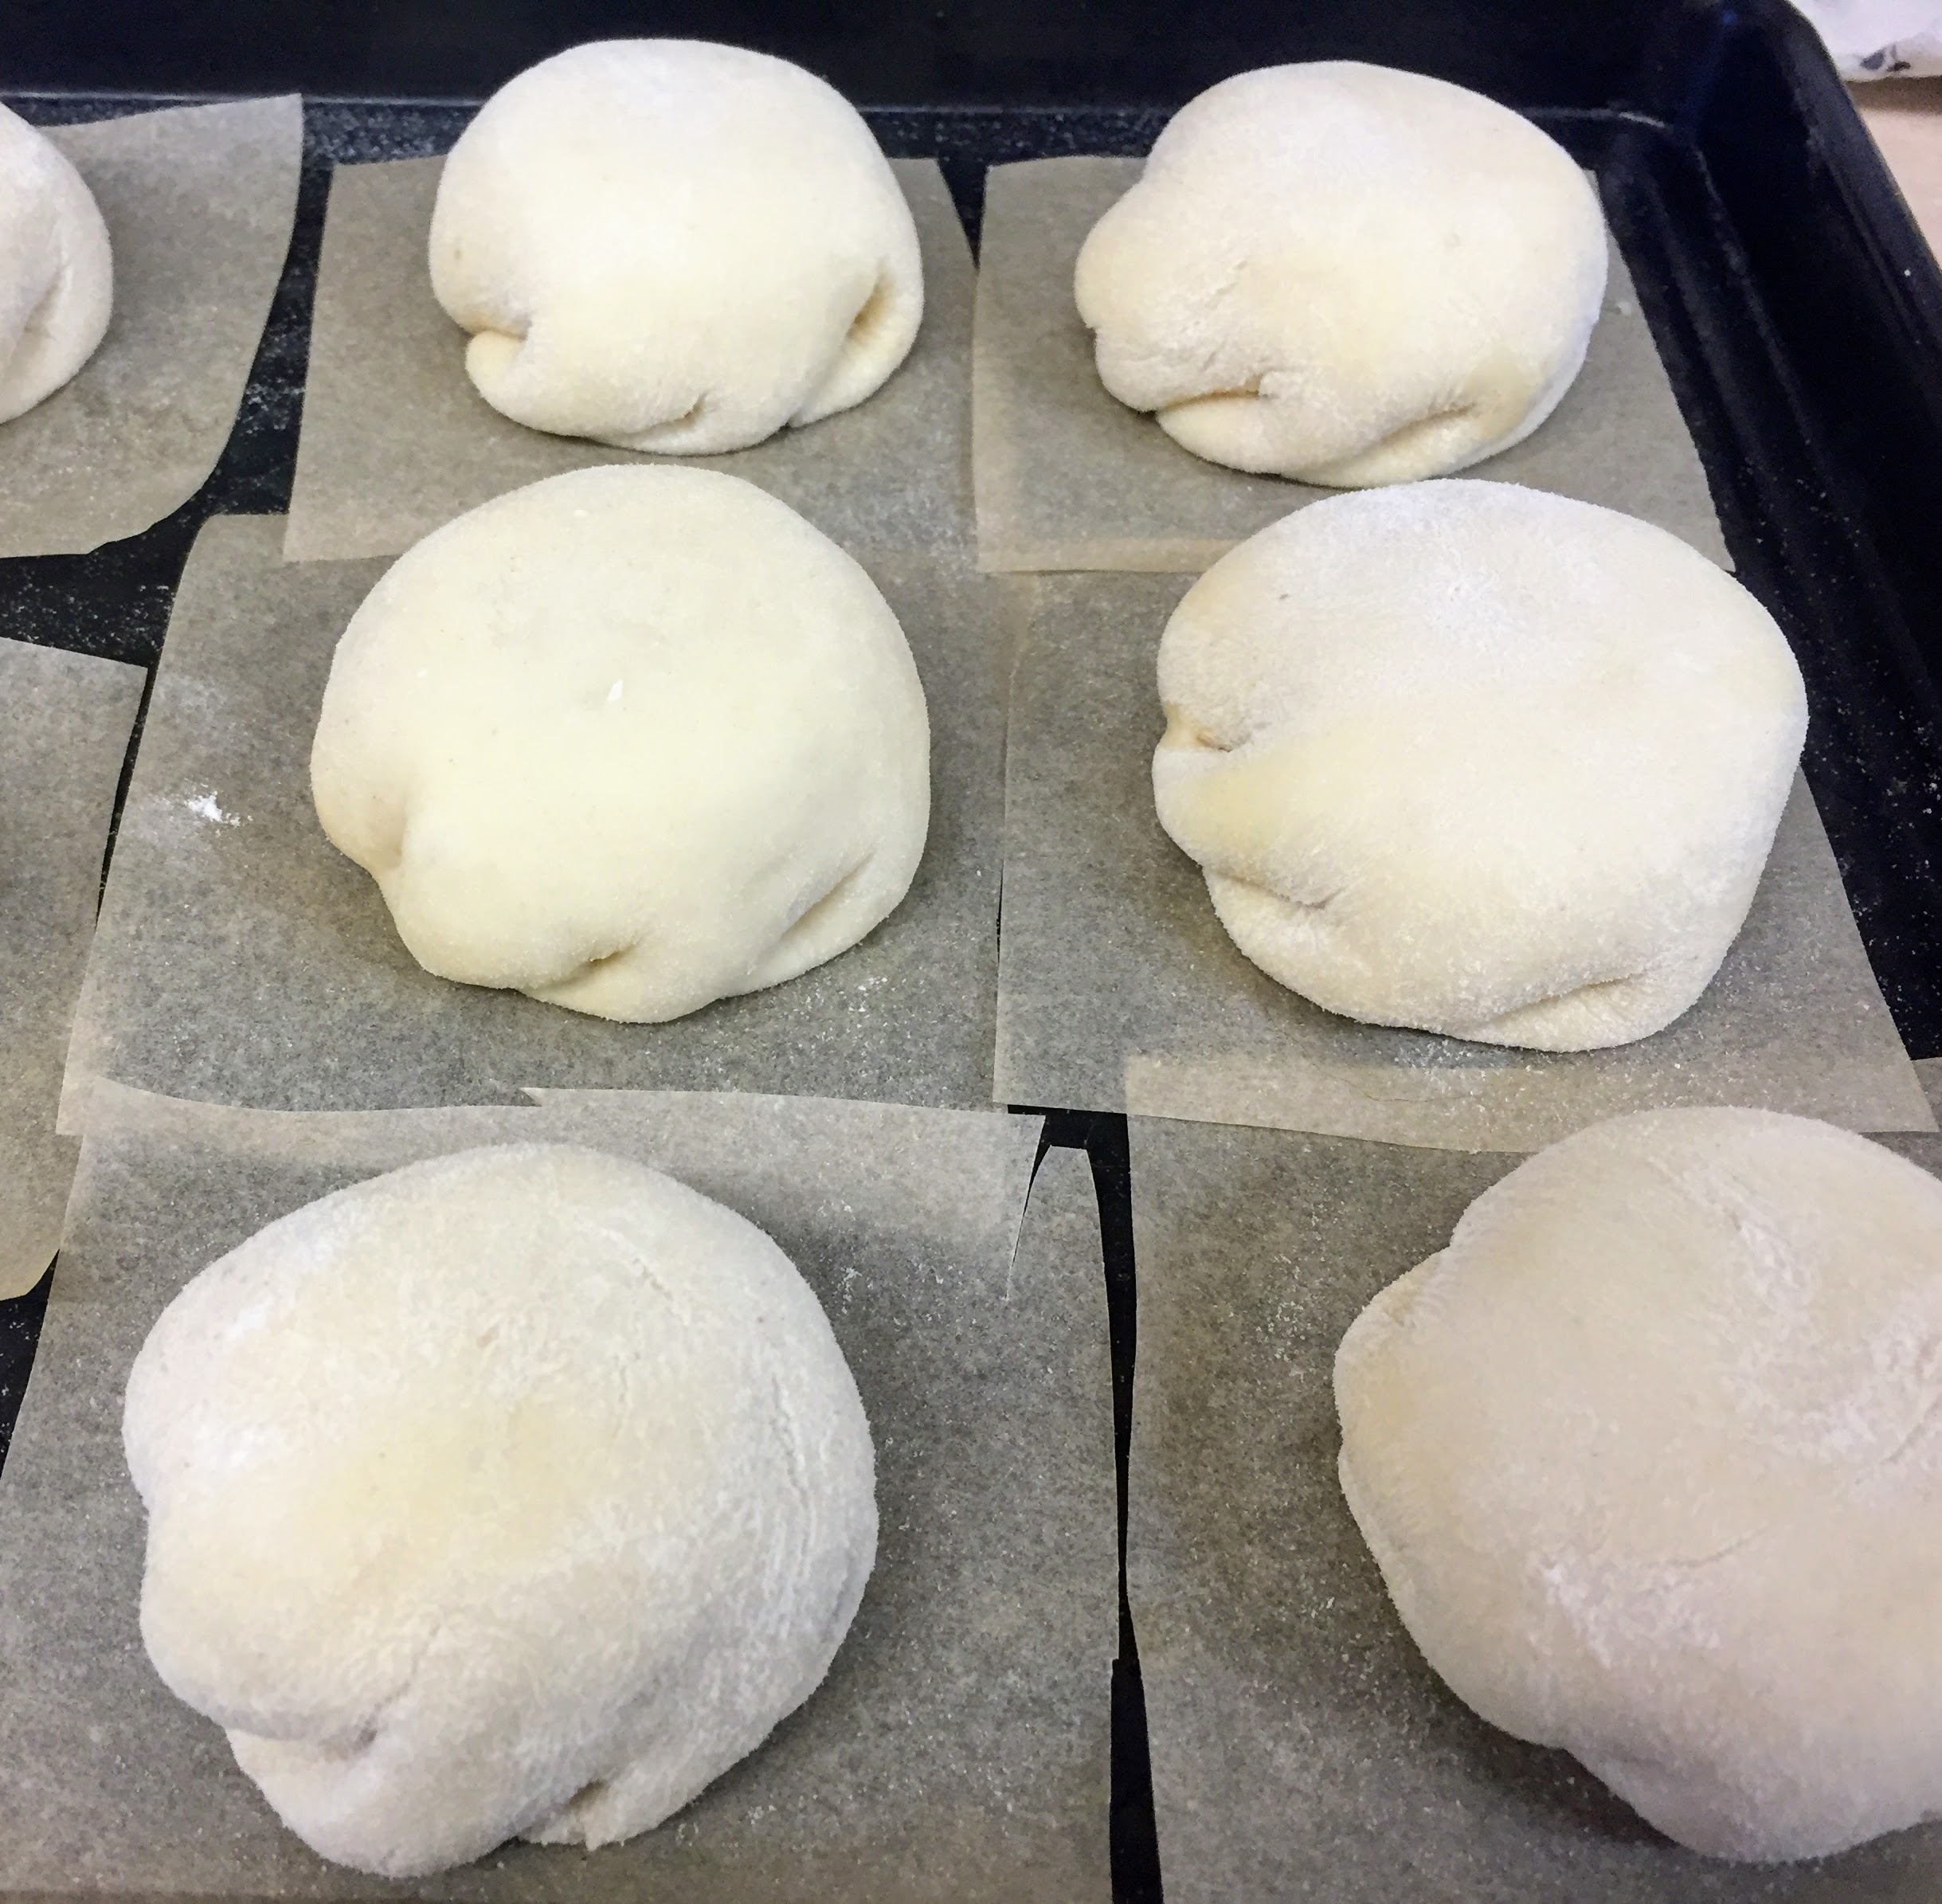
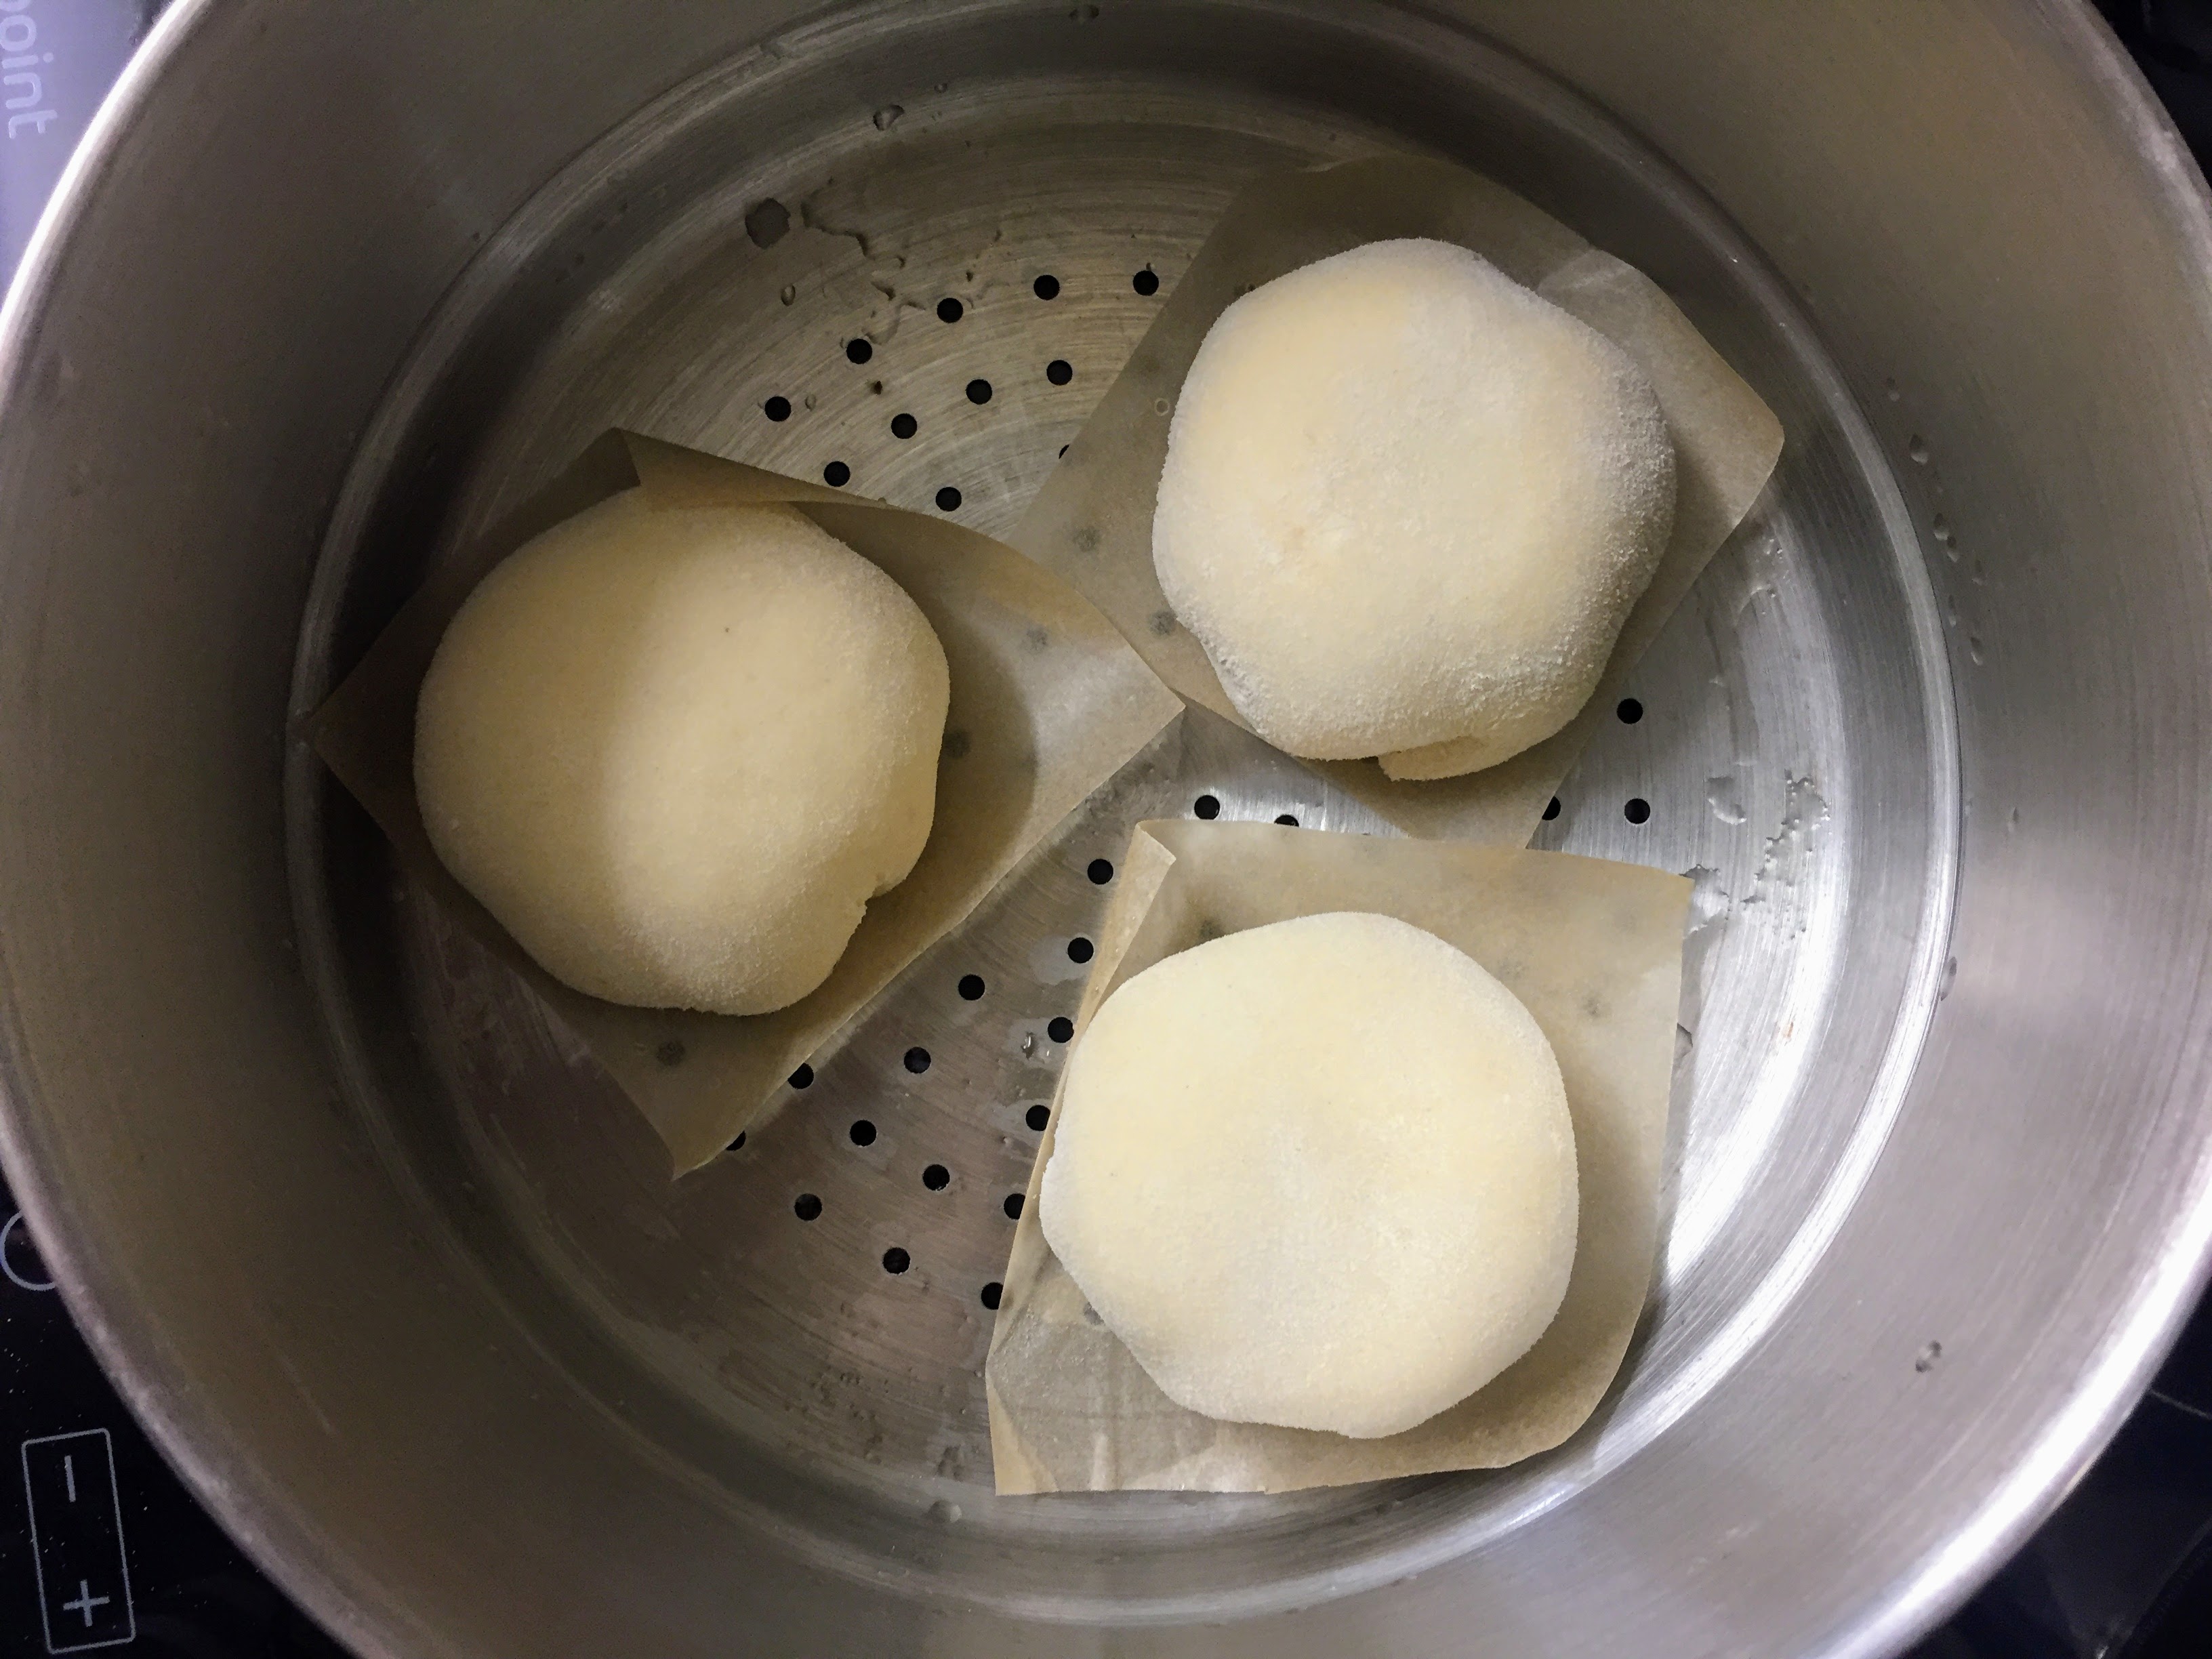
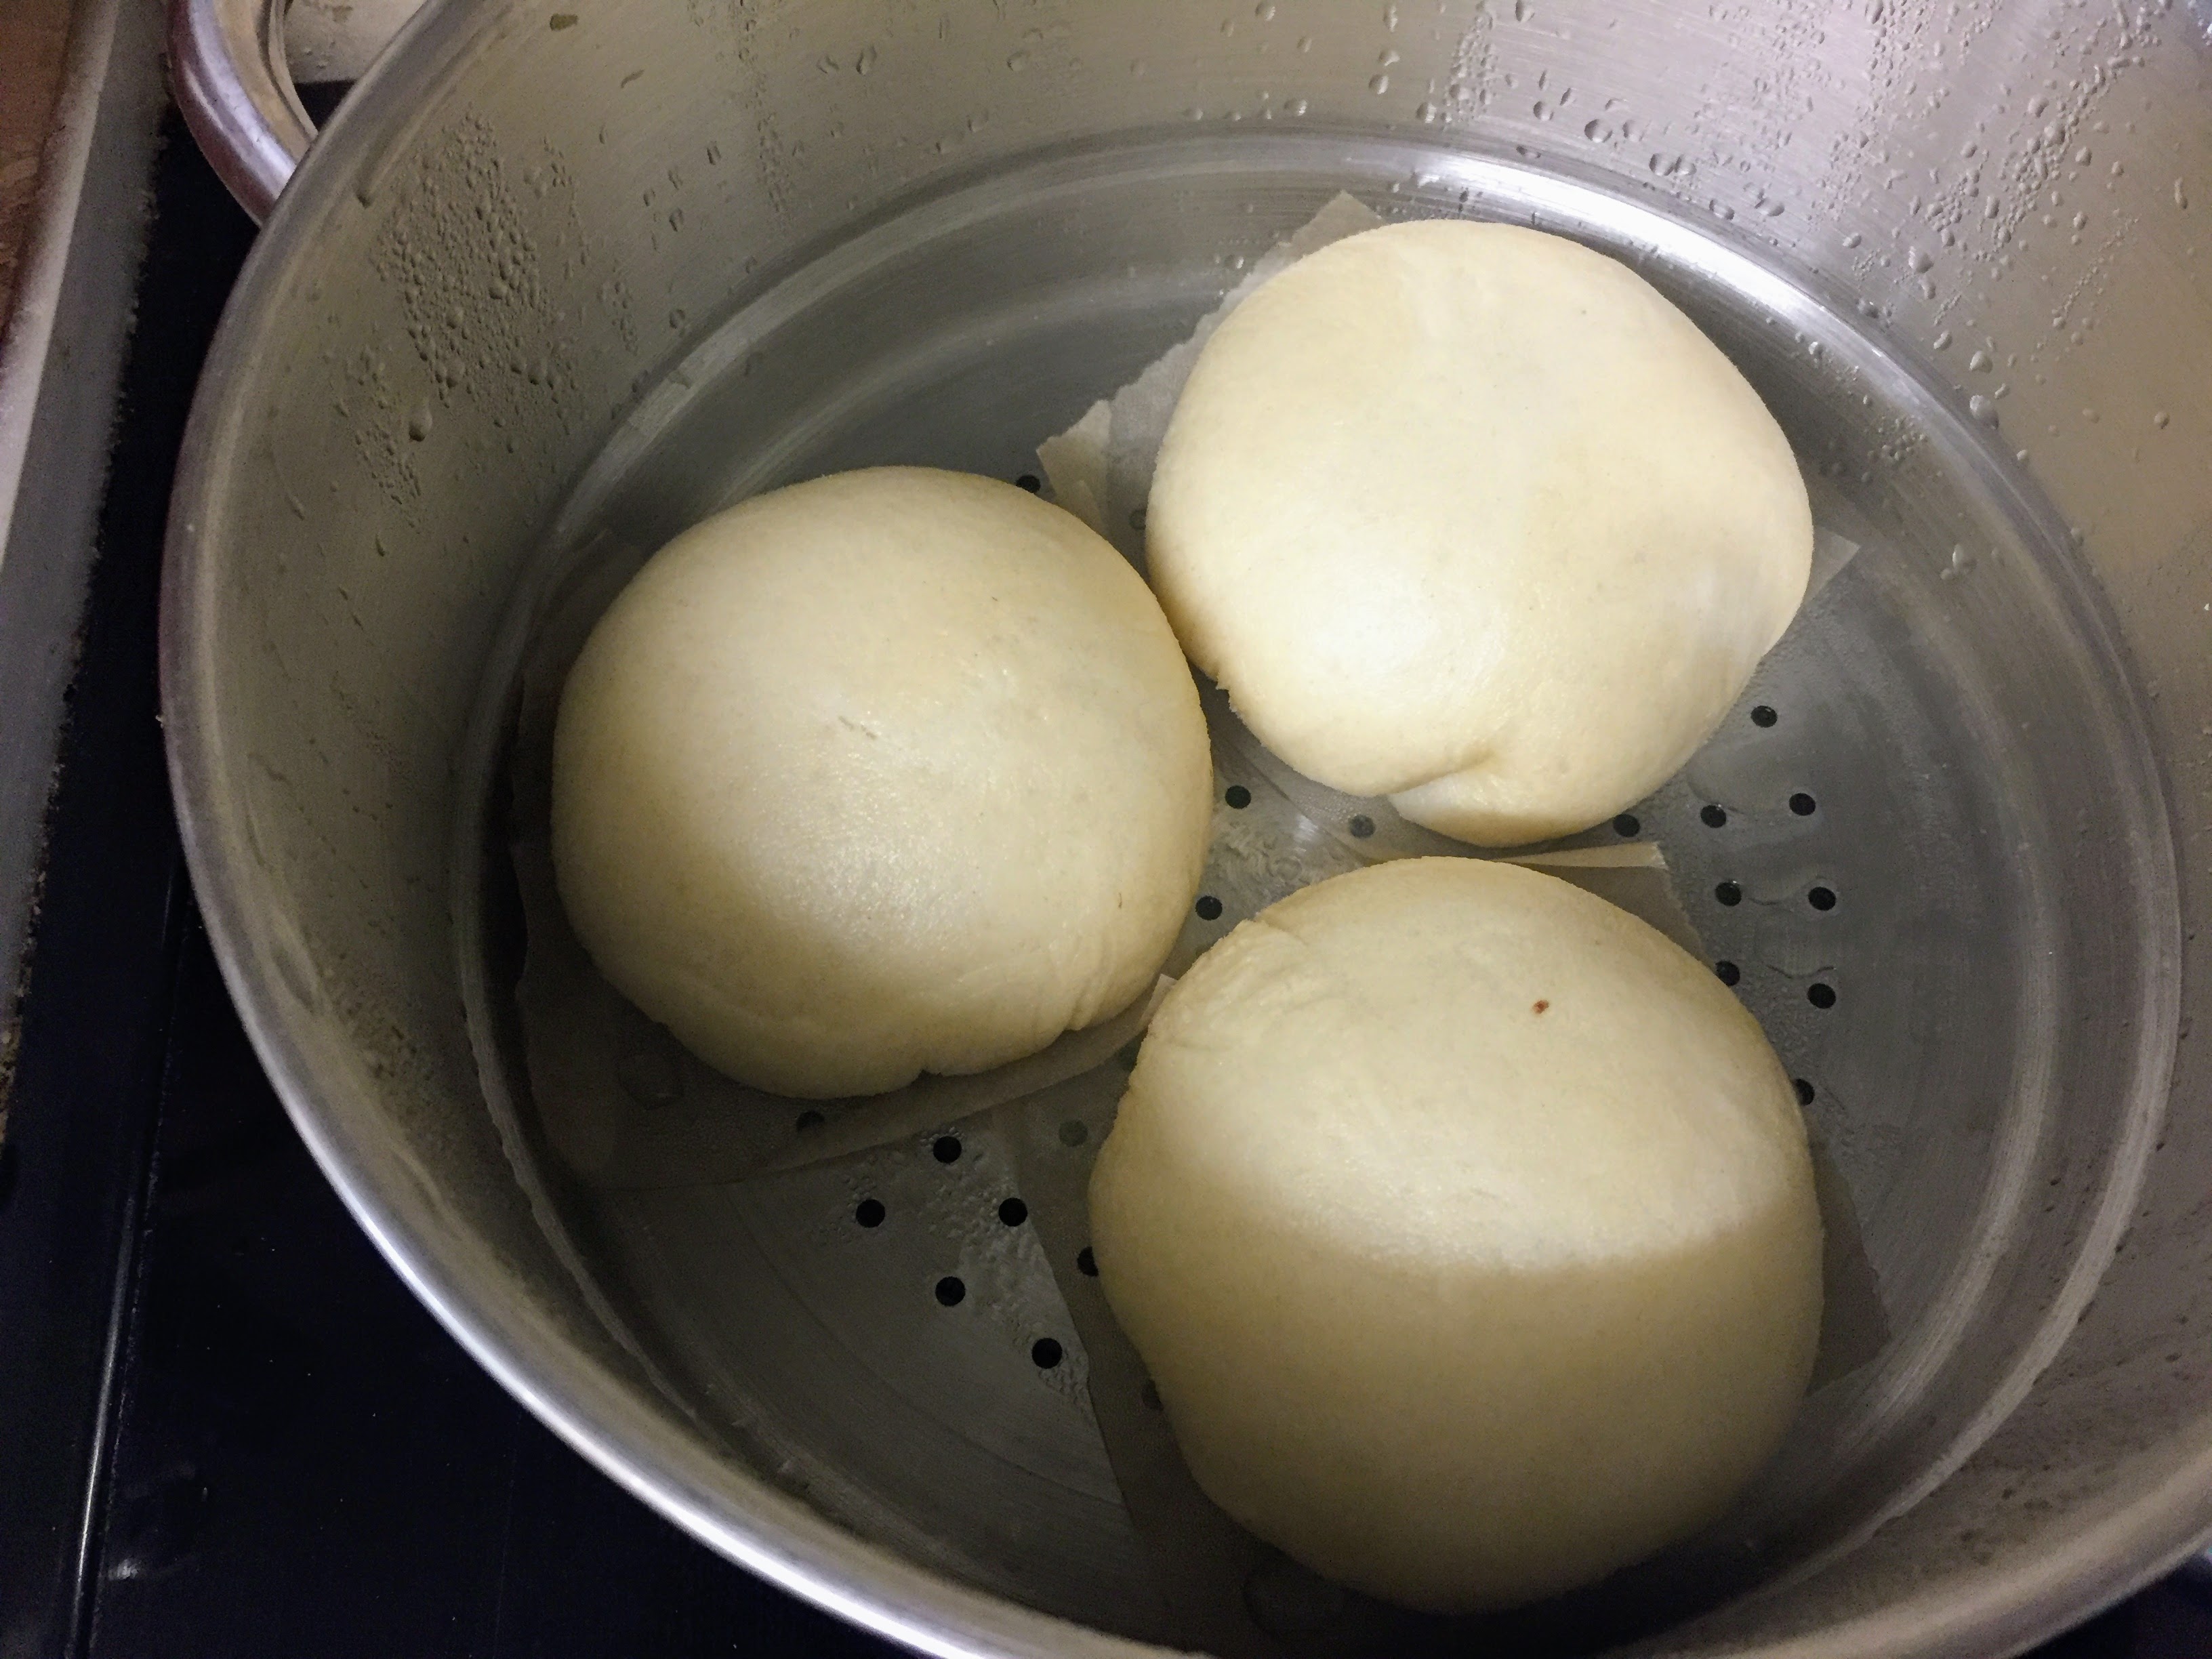
The shaped buns need to be left for another 30 minutes so they get a little more puffy before they are steamed. As the shaping and pleating is a little time consuming, I time them from when then first six are shaped (six being the number I can fit in my steamer at any one time). I use a three tier metal steamer, as this is what I have already, but the bamboo ones are also brilliant and and inexpensive. After 30 minutes, get the water in the bottom of your steamer to boiling point, reduce to a medium heat and then steam the first batch, still on their baking paper squares, for 8 minutes. You’ll know they’re done if you poke them gently and they spring back immediately.
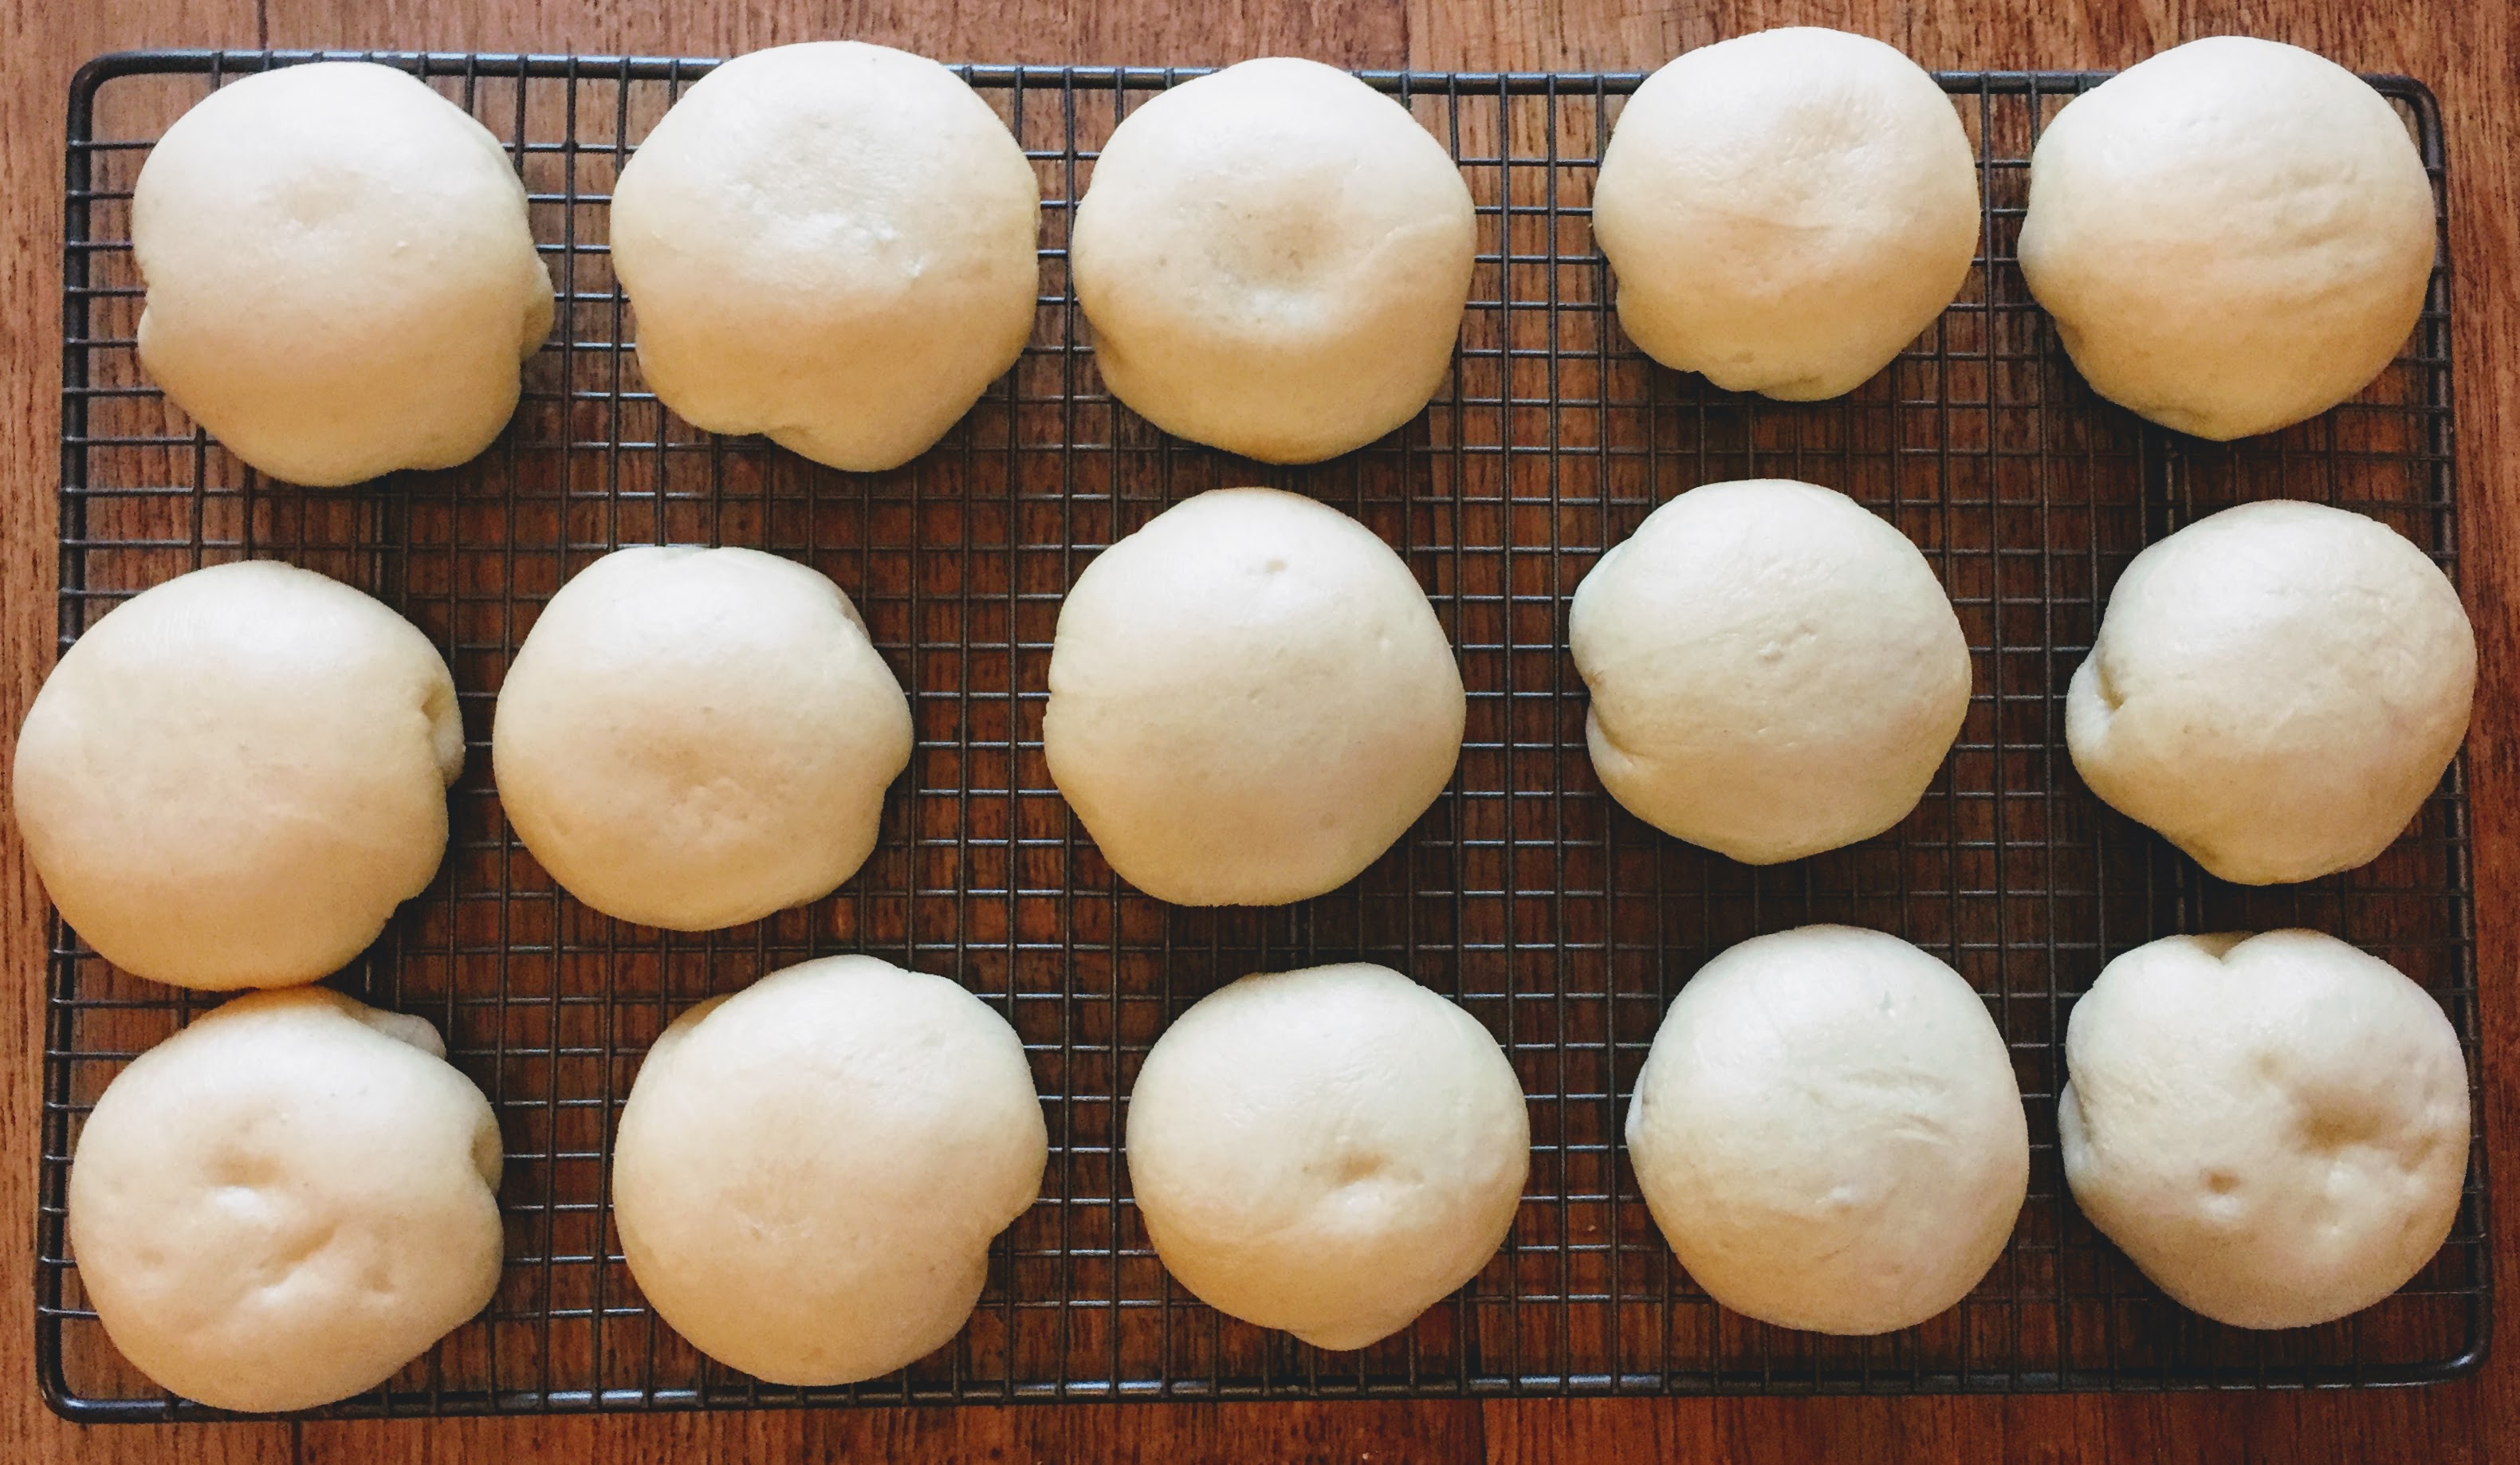
Transfer to a wire rack to cool – you’ll need to remove them from the baking paper so the bottoms don’t get soggy, but keep the squares aside. Repeat with the remaining buns.
You can eat them immediately, while the ganache in the center is still warm and oozing, or keep them in an airtight container for a day or two. However, one of the many things I love about bao is how well they freeze. Any buns that you can resist eating straight away can be frozen, then re-steamed and devoured, with indistinguishable pleasure, at a later date. Simply return the buns to their baking paper squares and flash freeze for an hour (i.e. place them on a baking tray or cooling rack directly in the freezer), then bag them up. Then whenever you want a squishy, chewy, chocolately treat, steam from frozen for 5–6 minutes.
Once you’ve got the hang of the shaping and pleating, these are really quite straight forward to make, which is a worrying discovery as I will likely be making a lot of them. There are many many fillings you could try out and I have numerous ideas that I want to try in the coming weeks – keep a look out for future posts!
Please let me know if you give these a try! I would love to hear how you get on. You can comment below or find me on Instagram and Twitter @greedybearbakes.
Vegan Chocolate Bao (Steamed Buns)
Soft, chewy and buoyant steamed buns with a rich chocolate ganache filling
Vegan, Nut-free, Soya-free
For the dough:
- 100ml (⅓ cup + 1 tbsp) non-dairy milk (I used oat milk)
- 130ml (½ cup) warm water
- 1 tsp instant dried yeast
- 50g (scant ¼ cup) caster sugar
- 400g (3¼ cups) plain flour
- 1 tsp baking powder
- 1/2 tsp salt
For the filling:
- 200g (7oz) vegan dark chocolate*
- 120ml (½ cup) non-dairy milk (I used oat milk)
- salt to taste
Directions
- Measure 100ml non-dairy milk and 130ml water into a jug – you want the overall temperature to be luke-warm but definitely not hot. Mix in 1 tsp dried yeast. In a separate bowl measure out the sugar, then add a generous pinch to the yeast mixture to help the yeast activate, and set aside.
- Add the rest of the dry ingredients (400g flour, 1 tsp baking powder and 1/2tsp salt) to the bowl with the remaining sugar. Once the yeast mixture is frothy on top, add to the dry ingredients and mix with your hands until it forms a shaggy dough. Transfer to a lightly floured surface and knead for 5–6 minutes until smooth and elastic. Clean and lightly oil the bowl, and return the dough to it, covering with a damp cloth or tea towel, and leave to prove for around 90 minutes until doubled in size (it may take less time on hot days or longer on cold).
- Once the dough is proving, make the ganache. Finely chop 200g chocolate and put in a heat-proof bowl. Add 120ml non-dairy milk to a small saucepan and place over a medium heat until the milk is hot and steaming, but not boiling. Pour the milk over the chopped chocolate and leave for 5 minutes, then stir or whisk the chocolate mixture until it’s smooth and glossy. If there are still a few lumps of chocolate, put in the microwave for 10 secs, stirring thoroughly each time, until smooth. Transfer to a shallow dish or bowl and refrigerate.
- Gather everything you need for shaping the bao; cut out 16 squares of baking paper (7 or 8 cm squared) and have a tray and clean tea towel ready, as well as a small bowl of water, a knife, a rolling pin, a tablespoon measure, and a clean damp cloth. When the dough has doubled in size, tip onto a lightly floured surface and knock out the air, then cut the dough into two equal pieces with the knife, and each piece in half again. Place three pieces back in the proving bowl under the damp cloth, and roll the fourth into a sausage shape. Score with the knife into four equal pieces, and separate each section with your hands (this will make it easier to roll each piece into a ball than if you use the knife). I’d recommend keeping everything except the piece of dough you are working on under a damp cloth; it will prevent the dough from drying out and makes it easier to work with. Take the ganache out of the fridge – it should have had enough time to set reasonably firm.
- Take your small piece of dough, roll it into a ball between your palms and flatten slightly with the heel of your hand. Roll into a small circle with the rolling pin (roll the centre of the dough, leaving the top and bottom a little thicker, then turn 45 degrees and do the same, and repeat until you have a circle). Then go around the edge of the circle with the rolling pin, rolling out the edges and leaving a thicker disc in the middle; a bit like a fried egg. Scoop a level tablespoon of ganache and place in the middle of the dough (you may need to clean your hands with the damp cloth at this point, so you don’t get ganache on the outside of the bun), then lift the entire thing into the palm of one hand, and pleat the edges around the ganache with the other (see photos in the blog post above).
- Twist the pleats slightly to bring them together around the ganache. Dab a tiny bit of water on the edges of the pleats to bring them together in the centre (don’t worry if there’s still a small hole) and place the bun pleat-side down on a square of baking paper, on a baking tray. Cover with the clean dry tea towel, and repeat with the remaining dough.
- Leave the shaped buns for 30 minutes to get puffy (I time this from when the first six are ready as this is how many I can fit in my steamer at one time). Put your steamer on a high heat and bring to the boil, then reduce to a medium heat and add your first batch of buns, still on their baking paper squares. Steam for 8 minutes, until they spring back immediately from a gentle poke. Transfer to a wire cooling rack, removing the buns from the baking paper squares but keeping these to one side, and repeat with the remaining buns.
- Eat immediately, or leave to cool, and either keep in an airtight container for up to 2 days, or return the buns to their baking paper squares and place directly in the freezer on a baking tray. Flash freeze for 1 hour, then place in a freezer bag or container. You can then steam them directly from frozen in about 6 minutes.
Notes
*I prefer using a dark chocolate that’s between 50% and 60% cocoa solids, as this adds a little more sweetness to the ganache. If you prefer a more bitter chocolate flavour you can go for something in the 70-85% bracket, or for a sweeter ganache you could use something like Cadbury’s Bourneville which is under 40%. It’s better to vary the sweetness with the type of chocolate you use, as adding sugar or syrup can split the ganache.

Those look so fluffy!! My mouth is watering!!!
LikeLiked by 1 person
They are SO fluffy – I’m obsessed! 😍
LikeLiked by 1 person
I have been looking for a quick yummy breakfast featuring a strong chocolate hit, but low on fats and sugars, I think this might be it …thank you! The freezability makes them perfect, but I will be trying to reheat in a microwave for early morning speed, rather than setting up a steamer even thought the re-steam time is only 6m from frozen. Has anyone else tried this yet?
LikeLiked by 1 person
This is a great idea! They’ll be fine in the microwave but I’d use a very low/defrost setting initially to defrost and then maybe blast for 10 seconds on high if you want the centre nice and melted. If you’re really in a rush you could always pop one or two in the fridge the night before to defrost, then just blast for 10-15 secs. Hope you enjoy! 😃
LikeLike