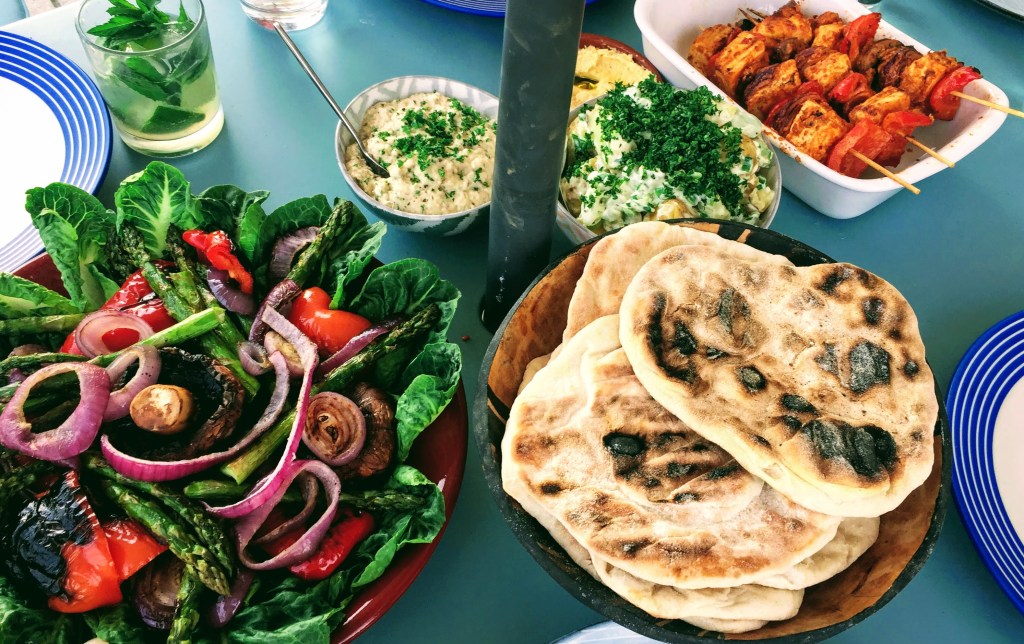
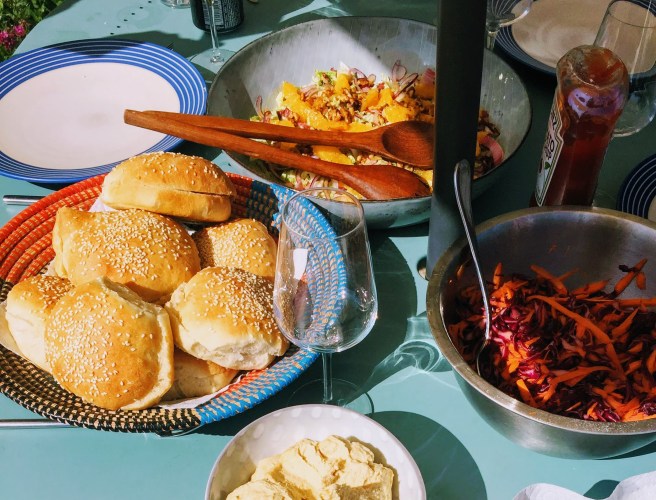
There is nothing quite like that charred, lightly cremated blistering that a decent BBQ can provide, and now sunnier day are here, it’s the perfect opportunity to expand your BBQ repertoire (that said, as I am writing it is cold and cloudy so I may have missed the boat on this one. There’s always next year.). What with certain lock-down restrictions still in place, unless you are fortunate enough to have some outside space at home then BBQ opportunities are likely to be limited. Grills and griddle pans can make adequate substitutes, and some outdoor spaces allow disposable BBQ’s. And if you have a garden large enough to adequately social distance, it may be a good time to reach out to your BBQ-deprived friends.
Anyone who has been vegetarian or vegan since for a few years will most likely have had the experience of attending a BBQ and being offered a finger roll and some limp iceberg as the meat-free option. As a child growing up in rural Herefordshire (think the eponymous cattle), I stoically grew to love ketchup sandwiches, but still dreamed that one day, the plight of ethical eaters might be a thing of the past (please imagine some sort of overly-emotive orchestral music as you read this). I couldn’t have imagined the array of plant-based offerings available in supermarkets now, and I truly hope that no young vegans growing up in today’s world have to experience the crushing disappointment of an empty bun.
And yet, I believe that not only vegans, but everyone, can do BBQ’s better. Having more of a focus on the wonderful array of ways you can cook vegetables on a grill means that everyone gets more variety, flavour and excitement. So over the next few weeks, I plan to write a series of blogs on with different ideas of what you can cook over coals, whether you fancy a few more interesting sides, or want to go all out with a vegan BBQ spectacular. Think grilled flatbreads, smokey baba ganoush, Tandoori tofu skewers, vibrant salads and charred pineapple pudding…
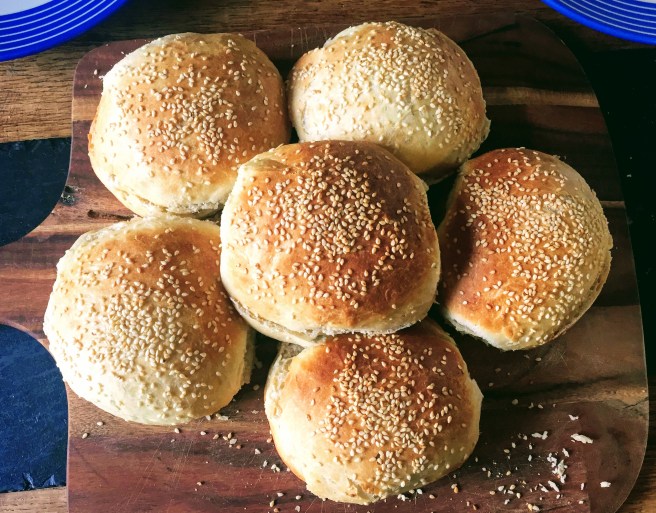
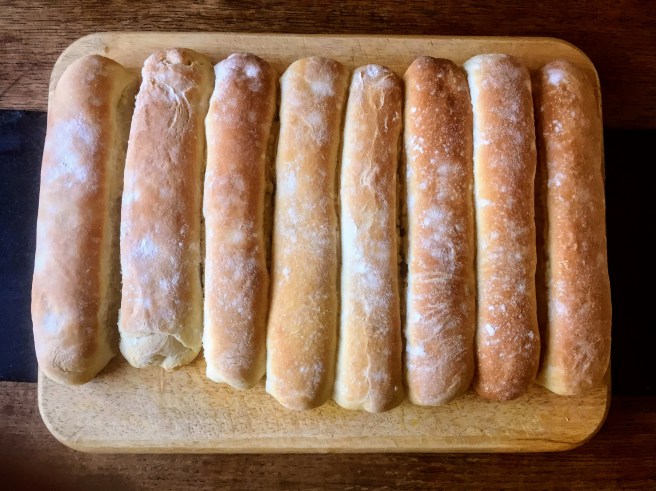
But it is also worth getting the basics right, and in this first post I present the softest of soft bread roll dough for all your burger bun and finger roll needs.
It has been virtually impossible to get dried yeast since the beginning of lock-down, but many farm and health food shops have started selling fresh yeast. Pre-lock-down I’d never considered using it but it’s surprisingly easy. I’ll give the quantities and method for both so you can use whatever you can get hold of. The downside of fresh yeast is that it only keeps in the fridge for about 2 weeks. Some say that it can be frozen but so far my attempts have resulted in some seriously un-risen dough.
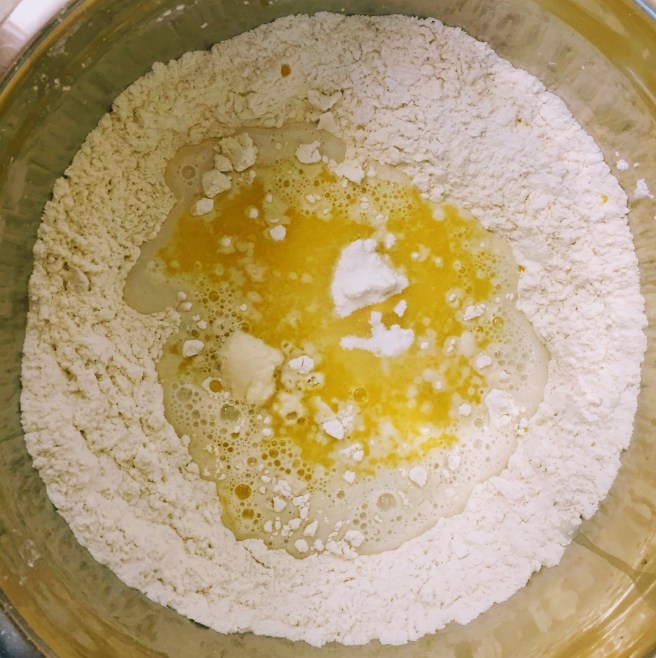
The basic ingredients of any bread dough are flour, yeast, water and salt. This recipe also uses a little fat and dairy-free milk, which helps make the resulting rolls soft and light. A teaspoon of sugar is a final addition which helps the yeast along.
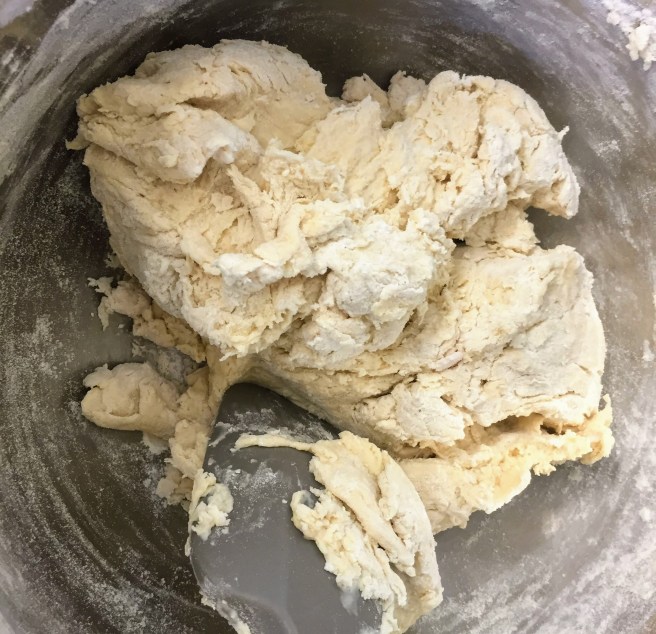
The only difference in method depending on which yeast you use is that for fresh yeast, you crumble it into the flour and rub it in as if you were making shortcrust pastry, before adding the rest of the ingredients. For dry yeast it’s best to wake it up first, so mix with the water (at a lukewarm temperature) and the sugar, and set aside for 5 minutes until it’s frothy on top. Then it can be poured over the dry ingredients along with the melted fat, and mixed to a shaggy dough.
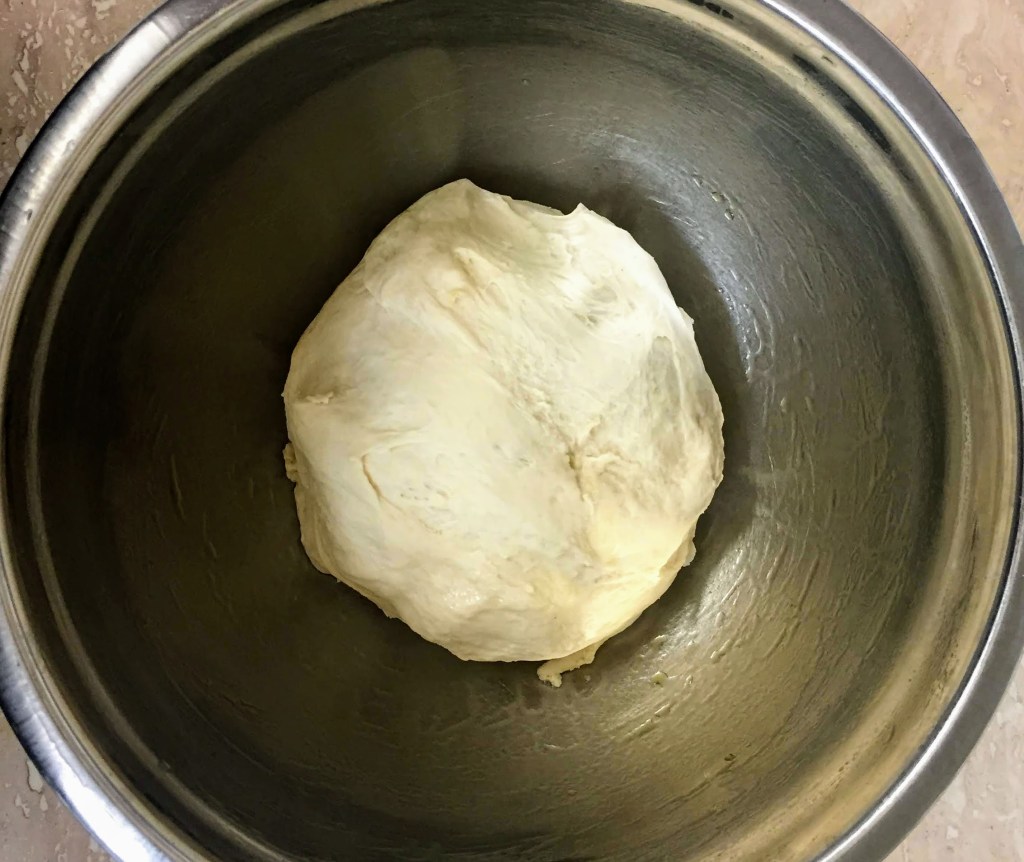
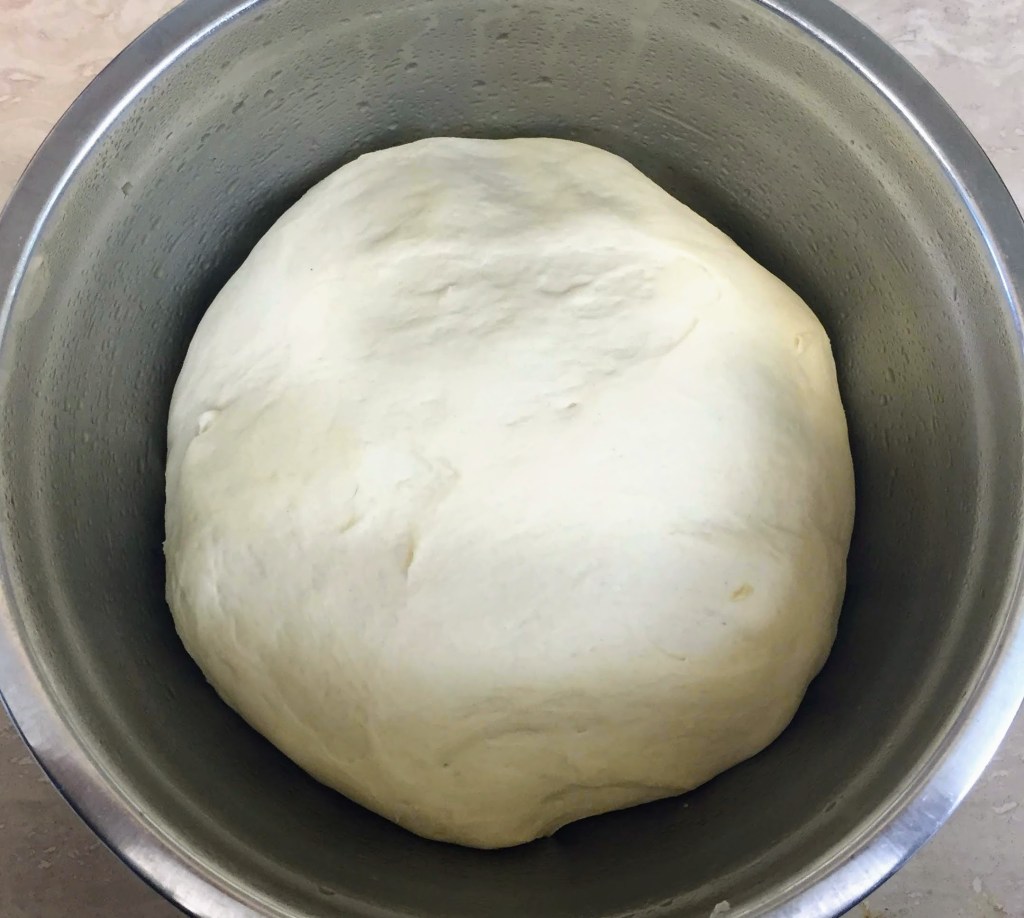
The next step is kneading the dough for 8–10 minutes – if you’re not familiar or confident with kneading there are loads of tutorials on YouTube. Then place the dough in an oiled bowl, cover with a damp cloth or some cling film and leave to rise until doubled in size. Usually this take about 1–1½ hrs, but be aware that fresh yeast can be more active and can rise more quickly, and warm weather also speeds things up, so keep an eye on it!
Then you undo all that good work by knocking the air out of the dough. Tip onto a lightly floured work surface and divide into 8 equal pieces for burger buns or long finger rolls, or 12 for small finger rolls. Shaping the rolls, rather than just squishing them into the shape you want, helps the dough retain its shape but also gives it structure so it rises upwards rather than flattening out.
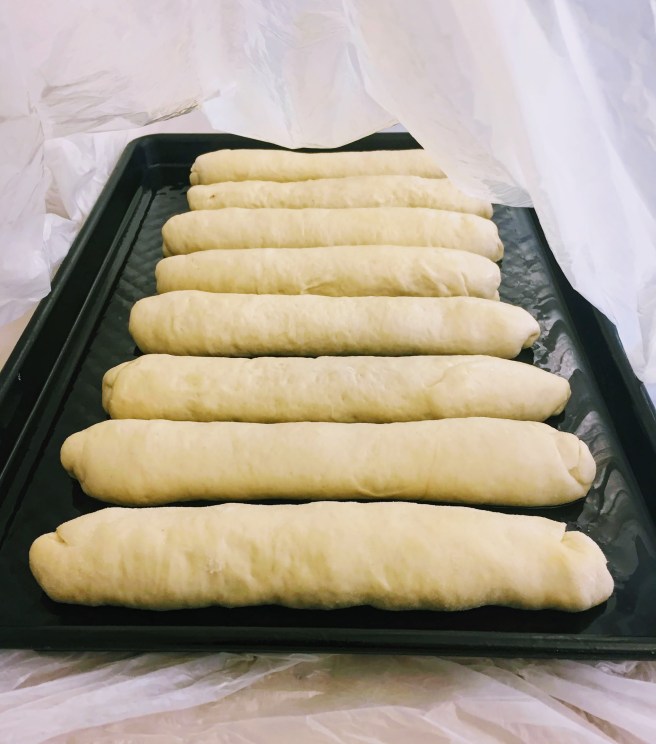
The easiest way I find is to flatten a portion of dough into a rough square. For round rolls, stretch out each corner a little and fold it into the centre, so you have another square, then do the same with those corners. Pinch the dough together to join any seams, then turn it over and gently rotate the dough between your palms until you have a nice, round roll shape. For finger rolls, fold the top third and bottom third of the square of dough into the centre, then press down with the heel of your palm where the dough overlaps to flatten it out into a rectangle, then fold in half top to bottom. Pinch the seem together and gently roll with both of your hands moving back and forth, and from the centre to the ends, until it’s as long as you want. Then place on a oiled baking tray and repeat with the remaining dough.
You’ll then need to cover the rolls and leave to rise for another hour or so, until doubled in size. You can buy proving bags but I just use an unused bin-bag and oil the inside. As you put it around the baking tray try to trap some air in there so the bag doesn’t impede the shape of the rolls as they rise.


Once they’ve doubled in size, brush with a little dairy-free milk (in place of egg wash), sprinkle with sesame seeds if making burger buns, and bake in a hot oven (220C fan) for 12–14 minutes. They should be golden brown in colour and sound hollow if you tap the bottom. If you are unsure, and the rolls are close enough that you need to pull them apart (which I consider essential for finger rolls), then pull apart one in the middle and gently press the bread with your finger. If it springs back then it’s done, otherwise, if it’s still doughy, bake for another couple of minutes.
You’ll notice when you remove the rolls from the oven that the crust feels quite firm. Do not panic. Move the rolls to a cooling rack and cover with a clean tea towel. This will create a little steam as they cool and will soften the crust so you have the perfect soft roll, to fill as you please.
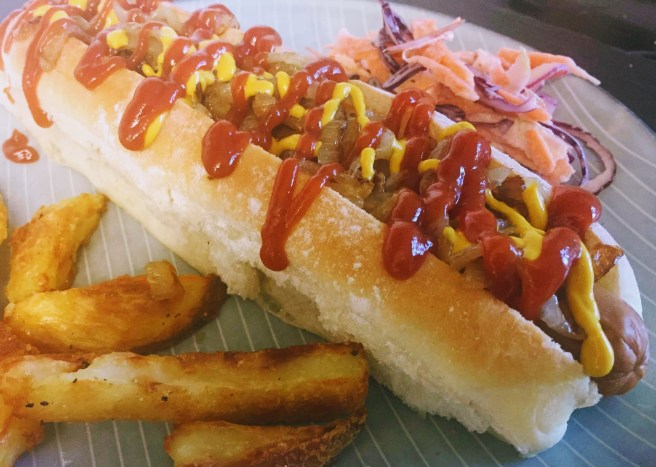
Soft Bread Dough for Burger Buns or Finger Rolls
The softest of soft bread rolls made with dried or fresh yeast – perfect for BBQ's!
Vegan, Nut-free, Soya-free option
Ingredients
- 500g strong white bread flour
- 1 tsp dried yeast OR 10g fresh yeast
- 1 tsp sugar
- 225ml warm water
- 75ml dairy-free milk (I use Oatly whole), plus extra for brushing
- 30g vegan butter or spread, melted (I use Naturli Vegan Block)
- 1 tsp salt
- 2 tbsp sesame seeds (optional)
Directions
- If you are using dried yeast, mix 1 tsp dried yeast, 1 tsp sugar and 225ml lukewarm water in a jug and leave for at least 5 minutes until frothy on top. Measure 500g flour into a large mixing bowl and add 1 tsp salt, 30g melted vegan butter or spread, 75ml dairy-free milk and the yeast mixture.
- If using fresh yeast, measure 500g flour into a large mixing bowl, crumble in 10g fresh yeast and rub into the flour until there are no lumps of yeast. Add 1 tsp sugar, 225ml lukewarm water, 75ml dairy-free milk, 30g melted vegan butter or spread, and 1 tsp salt.
- Stir the mixture, then use your hands to bring together into a shaggy dough. Tip onto a lightly oiled work surface and knead for 8–10 minutes. Put the dough in a lightly oiled bowl and cover with cling film or a damp clean cloth. Leave to prove for 1–1½ hrs until the dough has doubled in size (fresh yeast tends to prove a little quicker, and warm days also speed up the process so keep an eye on it).
- Knock-back the dough by pressing into it with your fingers to deflate it. Tip the dough onto a floured work surface and use a knife or dough-scraper to divide the dough into 8 roughly equal pieces (or 12 for smaller finger rolls), then shape the rolls*. Place them on an oiled baking tray and put the tray inside a proving bag, or inside an unused bin bag than has been oiled on the inside. Leave for another 1–1½ hrs until doubled in size.
- Just before the rolls have doubled in size, pre-heat the oven to 220C fan. Put a little dairy-free milk in a bowl and using a pastry brush, gently brush over the surface of the rolls – this will help them to brown. If making burger buns, sprinkle with sesame seeds. Bake for 12–14 minutes until golden brown, and hollow-sounding when you tap the bottom of the rolls. Leave to cool on a wire rack, underneath a clean tea towel.
Notes on shaping
*For burger buns, flatten each piece of dough into a rough square, then pull the corners into the centre, then do the same again. Pinch the seams together, then turn over and gently rotate the ball between your palms until it forms a neat circular shape. For finger rolls, flatten each piece of dough in a rough square. Fold the top third of the dough into the centre, and then bottom third. Use the heel of your palm to press down where the dough overlaps, to seal the seam and flatten the dough into a rectangle shape. Fold the dough in half, top to bottom, and pinch the seam together. Roll the dough, using both hands moving from the center to the ends until it is the length you wish.
